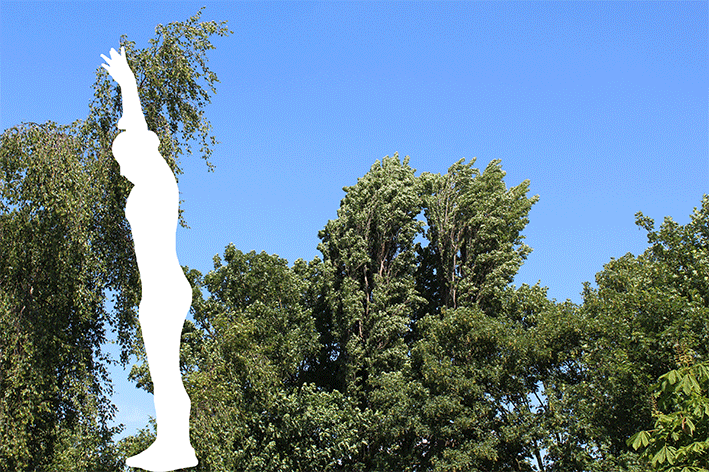
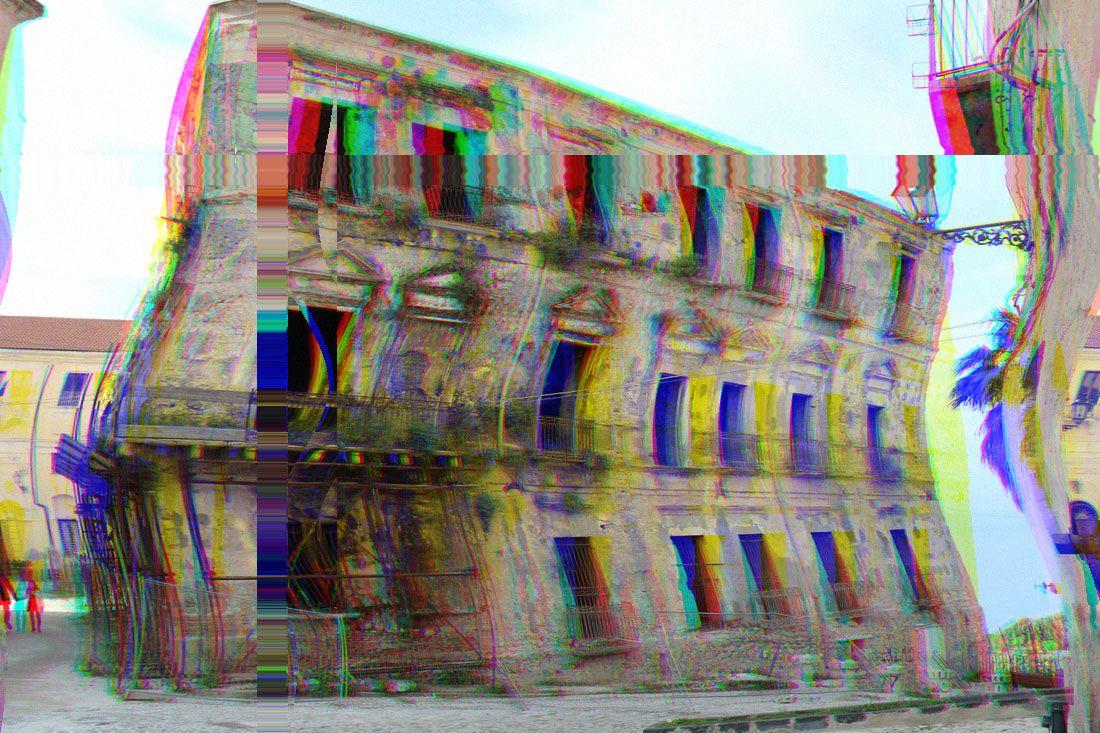
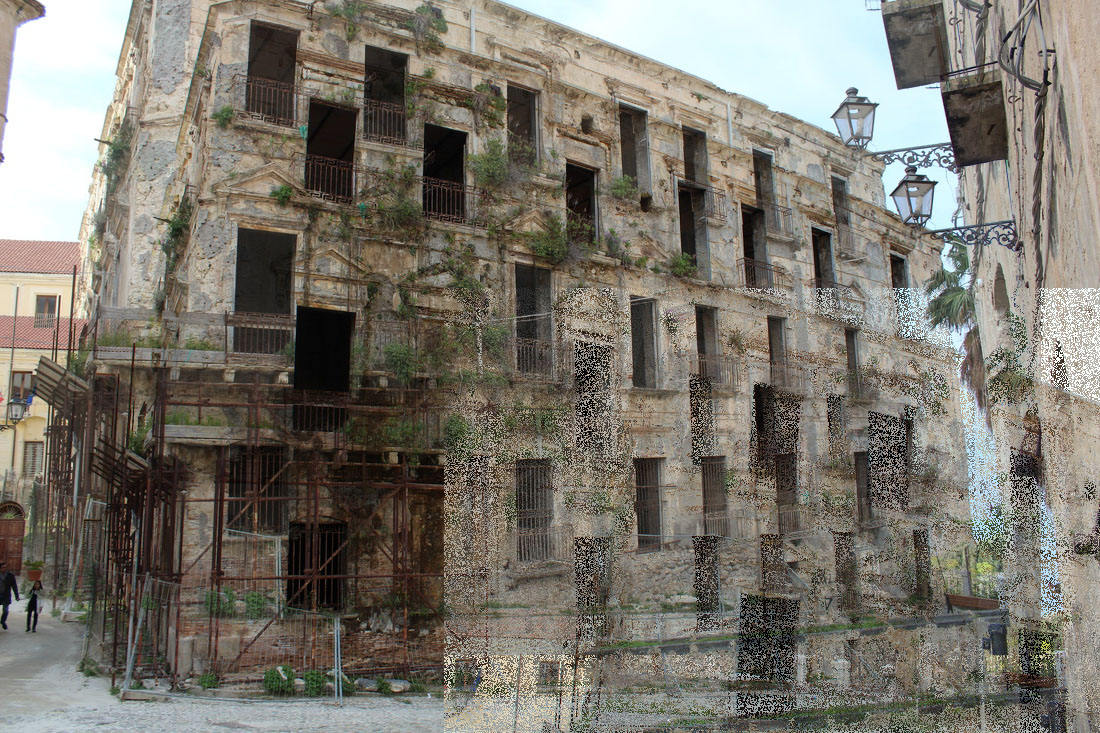
The gif below has been changed to a smaller image size to make the quality the image better.
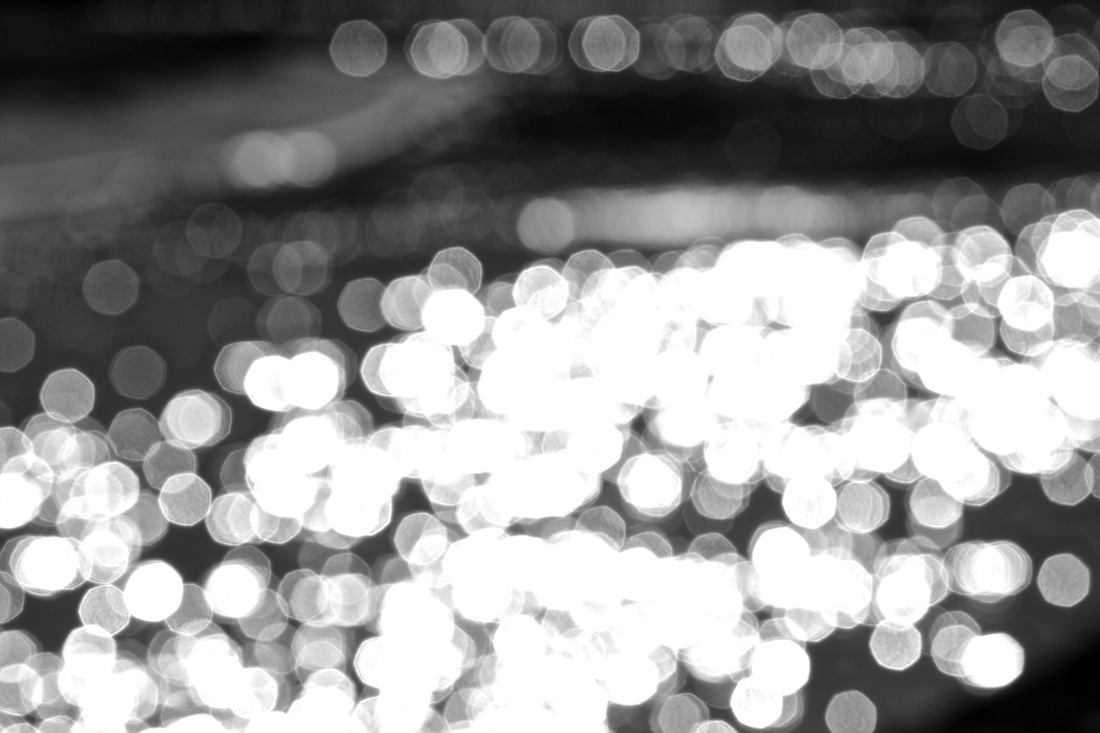
Abstraction in photography is fascination as unlike other visual art forms which juts begin from a black space for surface the artist creating the abstract piece fills this up with anything which can be interpreted in a all different views according to the person viewing it. it could be argued however that all art including photography is essentially abstract. photographs are versions of reality but the abstract factor to it adds a story and mystery to make the viewer think and work the image out like a puzzle. Photographs are artful selections. They are silent. In the early years of photography, certain artists understood this aspect of the medium and emphasised the abstract qualities of photographs and the disinterested eye of the camera. This tradition of abstraction in photography continues to the present day.
White Paper Challenge
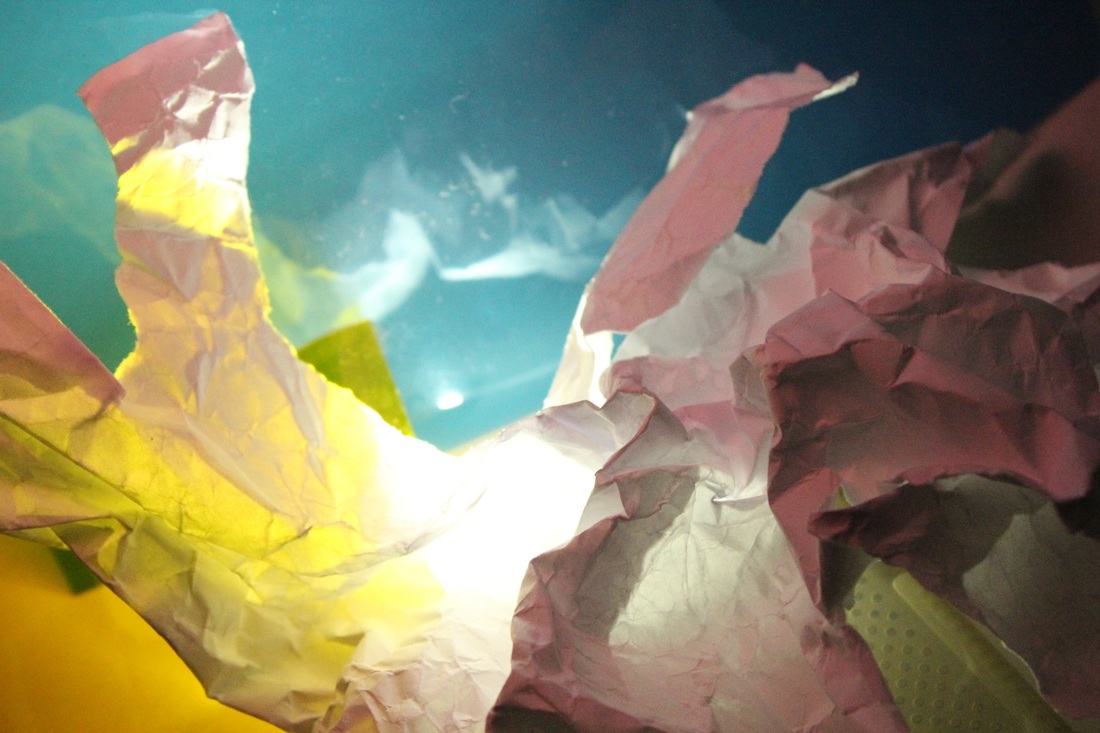
For our first task we got given 1 plain sheet of white paper. We shot these images on a plain background so that the concentration was more on the paper. we were not allowed to used any colours or lights to experiment with the images and making them more interesting. For our second response to the white paper challenge we now used torches, coloured lights and coloured paper, to create even more of an bract scene. i prefer these images i i believe the are more eye catching and interesting. we also used different textures glass, e.g glass with ripples and cracks to create a third layer of texture, which added even more contrast and even changed the colour of the lights through the glass.
|
|
|
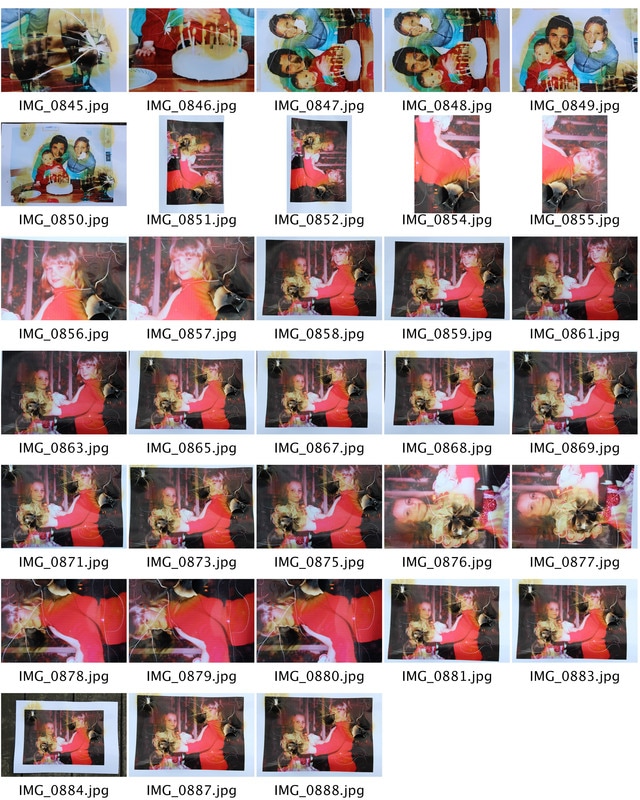
6 Favourite Images


DEVELOPMENT
For these three images i used photoshop for double exposer adjustments or colour and lighting and texture of the paper pictures. I also tried to add extra layers of texture by dissolving layers and double exposing them. i think to improve my editing i should have changed the contrast and saturation of the colours in each photograph. Doing this helps improve the lighting and the range of different sets of colour. I think that the colours of this 'paper challenge' is what makes the images much more interesting as it brings new factors to the pictures.
|
|
Artist Development
Brendan Austin
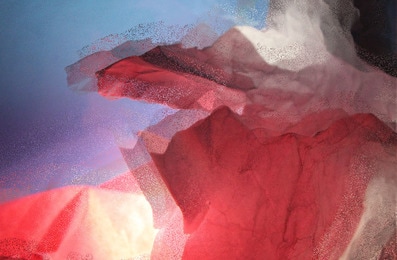
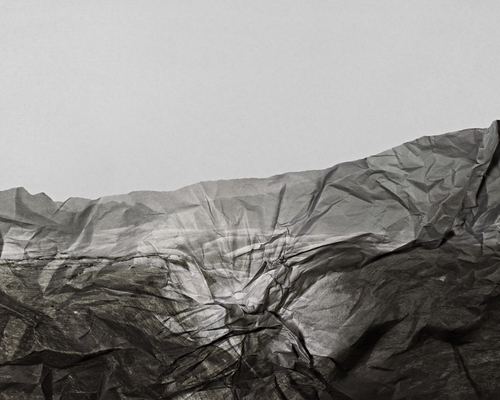
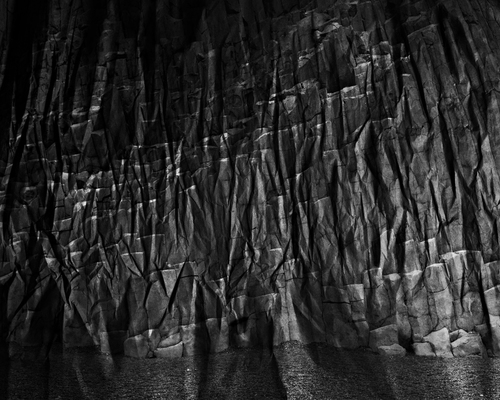
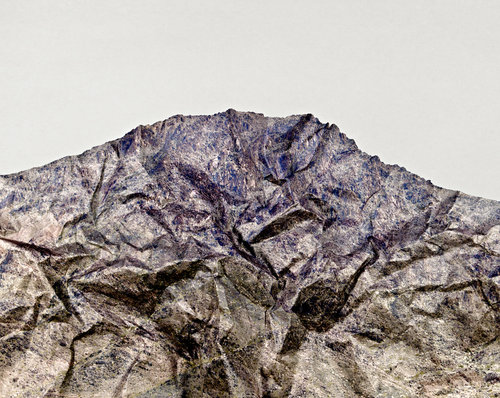
Austin's series "Paper Mountains" features landscapes such as mountains using crumpled pieces of paper to create the same effect of the rocks. His photographs depict the thousands of details within one singular focal point through his technique. He does this by manipulating with perspective so that when viewing his Paper Mountain collection we feel as though the paper is a mountain because of the scale Austin achieves. tenure is the key feature in his work here, as it lets the light bounce of the edges to create more of an abstract and realistic feel. I believe that the purpose of his images is to capture the true lighting textures and colours of mountains which gives his audience a feel for what he might feel passionate about.
|
|
|
Austins paper mountain project all use the same ideas and texture to create the abstract look of mountains and caves. howver all three of these photographs have different tones and colours which makes it easier to differentiate them from eachother, the colours are all very natural, he uses browns, whites, and grey/black tones to reate a surrealism and make the images look more like real life mountains, which link back to the purpose/intention of his images which was to capture real life mountains.
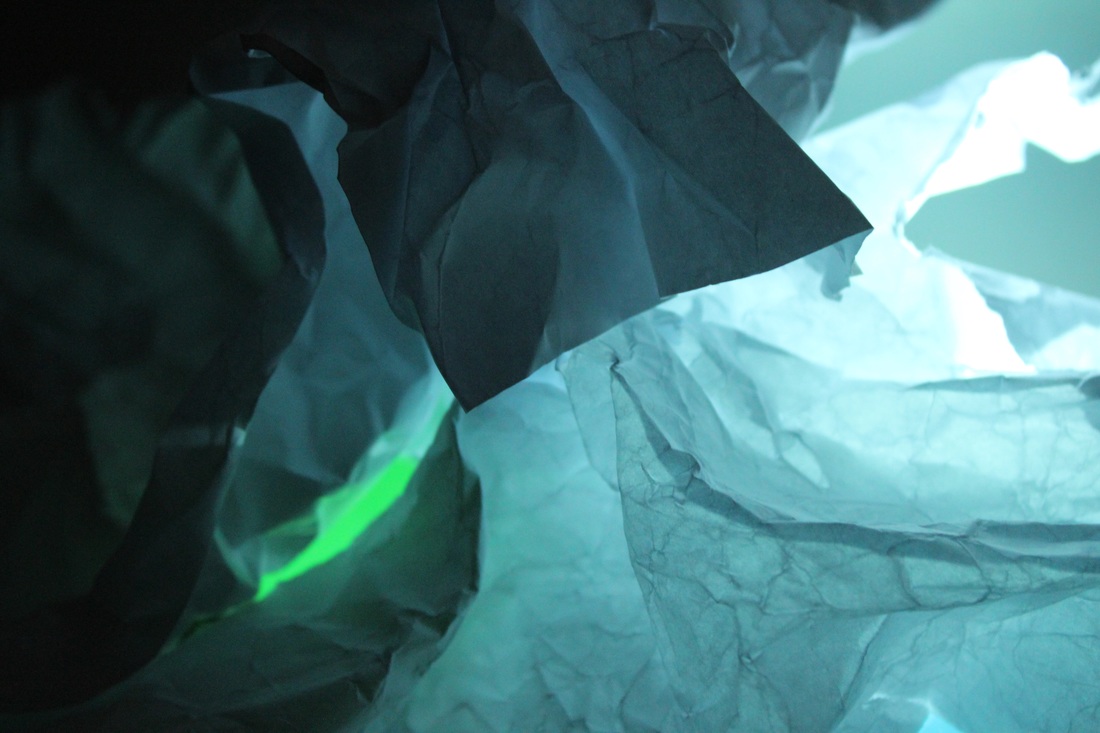
Second Artist Development - FRANCOIS DELAFOSSE
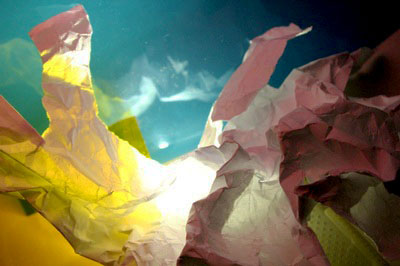
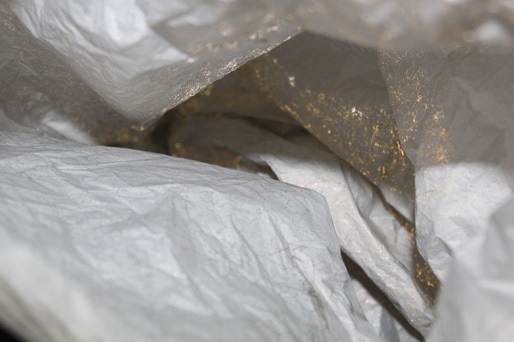
To develop my work further from the white paper task i decided to look at another artist well known for his use of working with abstract objects to create something the mind believes is true. Francois Delafosse is a photographer that takes photos inside crumpled up, used plastic bags. His work is mostly abstract and resembles a glacier cave in the north of the south pole. I like the way Delafosse uses different lighting as it creates different effects on the paper to give it texture and layers.
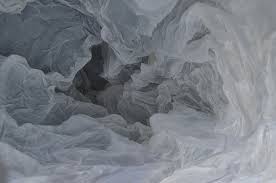
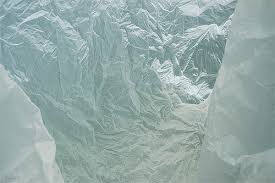
His work is similar to Brendan Austin's, as they both capture images which look as if they are real like natural sculptures, however have been manually created by the artists themselves. One difference between their work is the tone of light as these images are much brighter and have more undertones of blue making them seem colder. However Austin's work is darker and has more purple and brown undertones creating a warmer feeling.
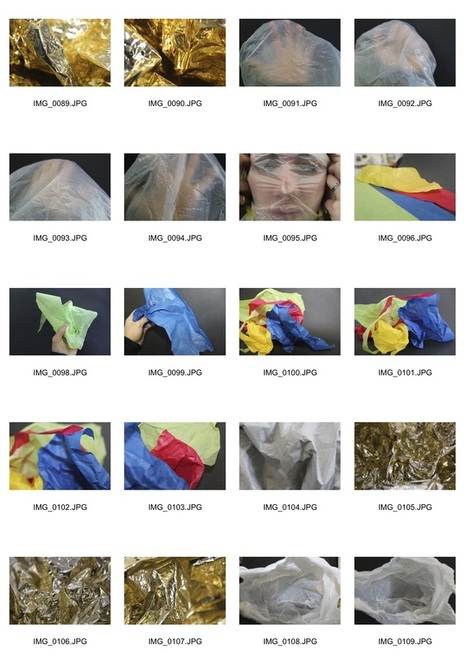
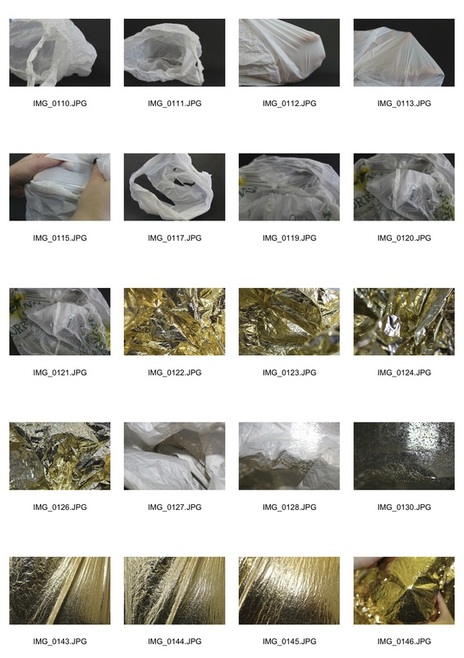
My response
I used a range of materials from plastic to glass and metallic materials to create different texture for my response. i thought by experimenting with materials such as plastic bags, tissue and gold tissue i could create a similar style to Francois work as it allowed me to understand the different lighting needed for each type of material so that i could achieve a crumpled undertone.
|
|
Artist and Me
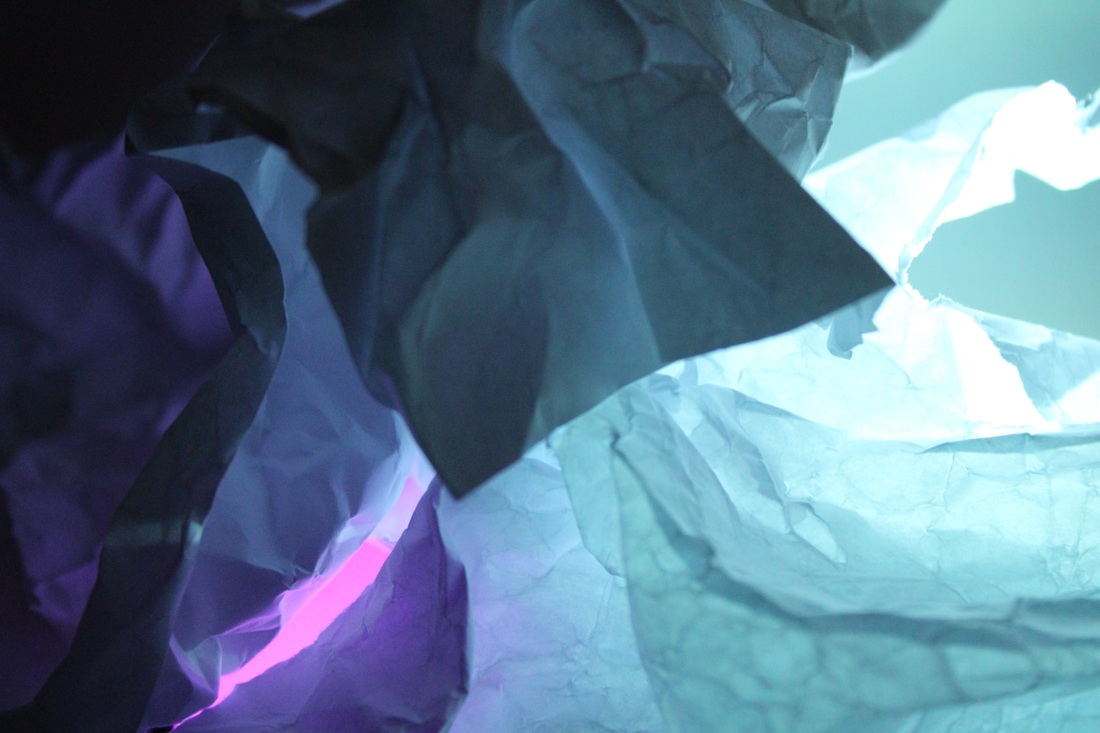
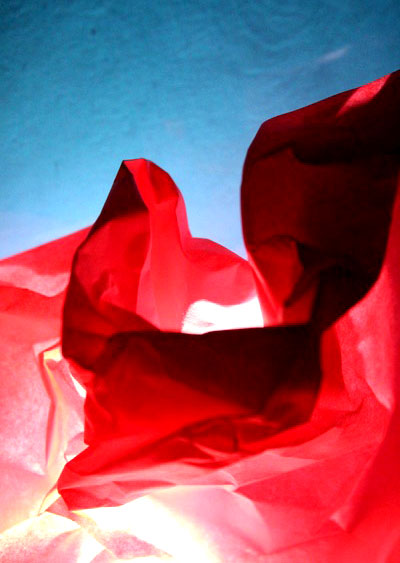
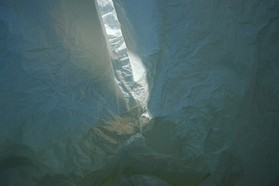
To improve my response to Dellafosse's work i could have used softer and darker lighting to create the same midnight Arctic look he achieved. i think the placing of my paper looks good as i have tried to make it look like the inside of a mountain.I tried making my work as similar to his work by using the same materials and tried to create the same texture with the paper. to make the lighting more similar to Dellafosse's work i should have used darker lighting with a undertone of blue, to also make the image look more icy.
Fransois Dellafosse work
The lighting in this image is dull and has a slight undertone of blue, This makes the image look cold. the way he has scrunched up the paper is in a much finer detail, with smaller and more delicate textures. i think Dallafosse has used plastic instead of paper to create this detail.
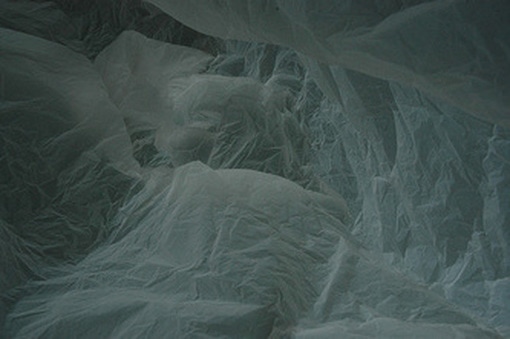
My work
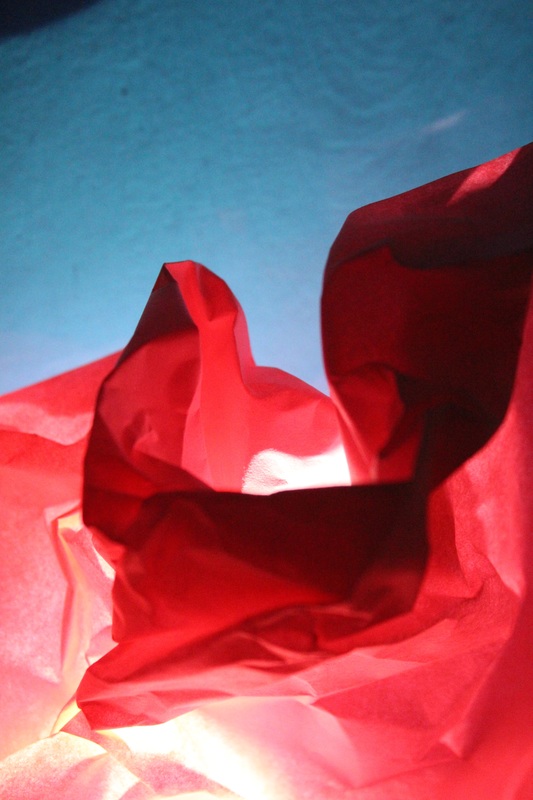
I think that i have created the right texture in this image however i could have used different materials to experiment with the textures and details. i also could have Photo shopped the lighting of the image so that it looked more like snow. one thing i liked about this image is the glittery gold parts as they reminds me of the shimmer you usually get on top of now.
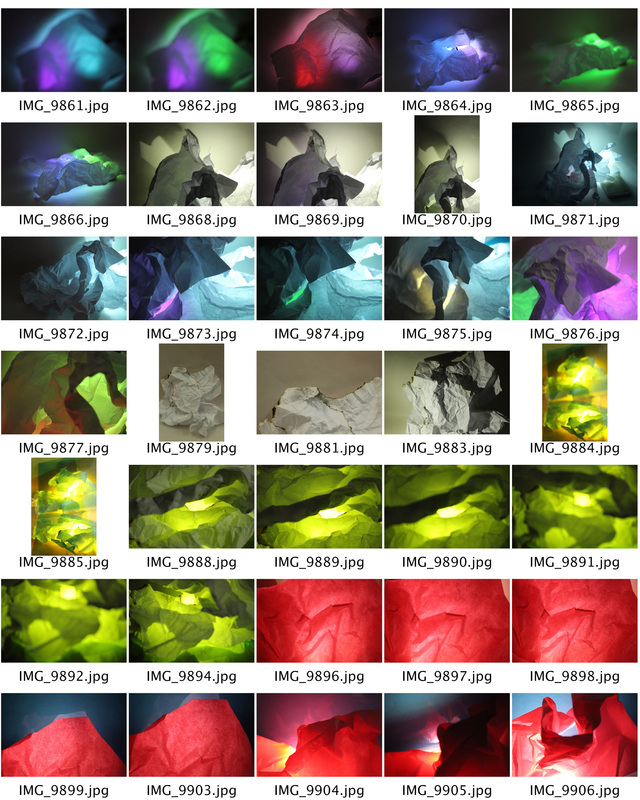
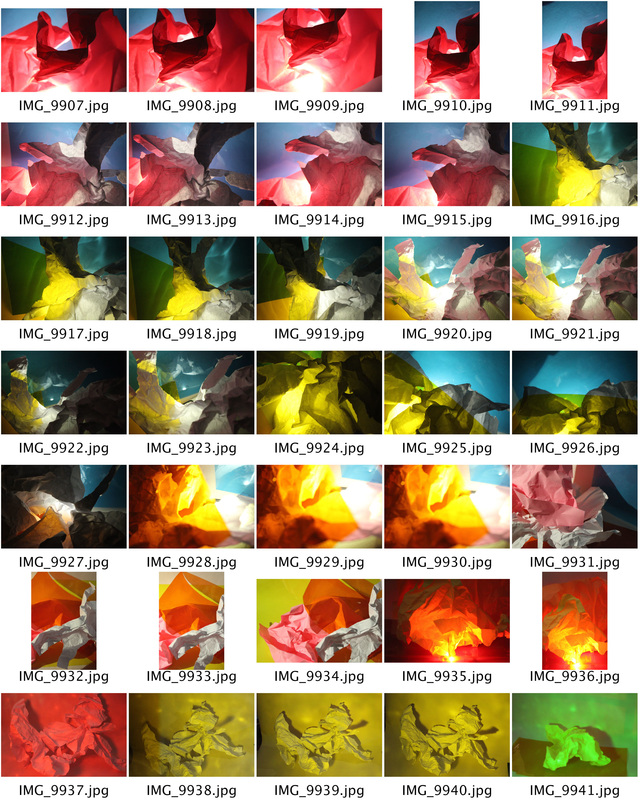
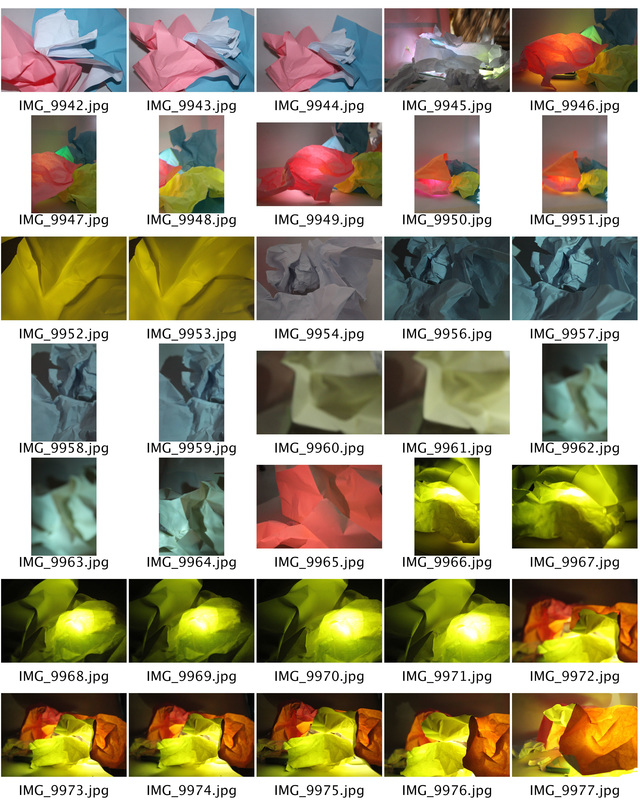
ABSTRACT EXPERIMENT
|
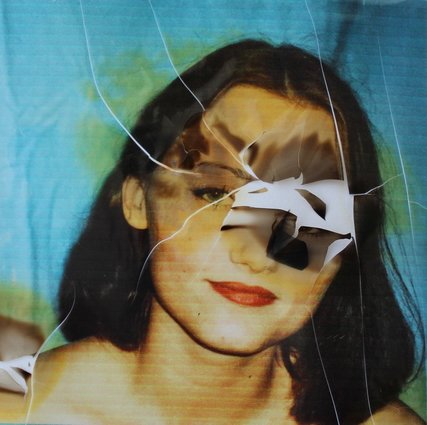
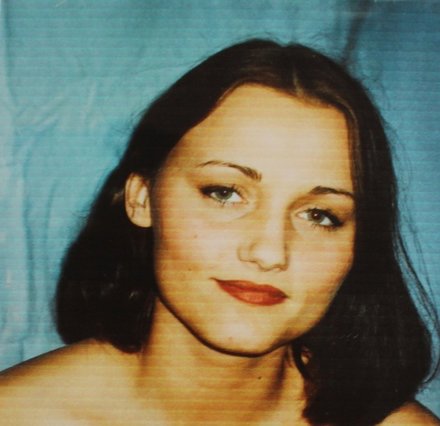
For this task i used this image of my right to edit both manually and using photoshop. i think this is a good image to play with as there are different layers, texture and colours through out the photograph. For the abstract experiment we were told to do anything with with image and make it look and tell the story of something different from the begging. The meaning of abstraction is relating to or denoting art that does not attempt to represent external reality, but rather seeks to achieve its effect using shapes, colours, and textures. so i tried to interpret this definition into my work.
|
MANUAL WORK
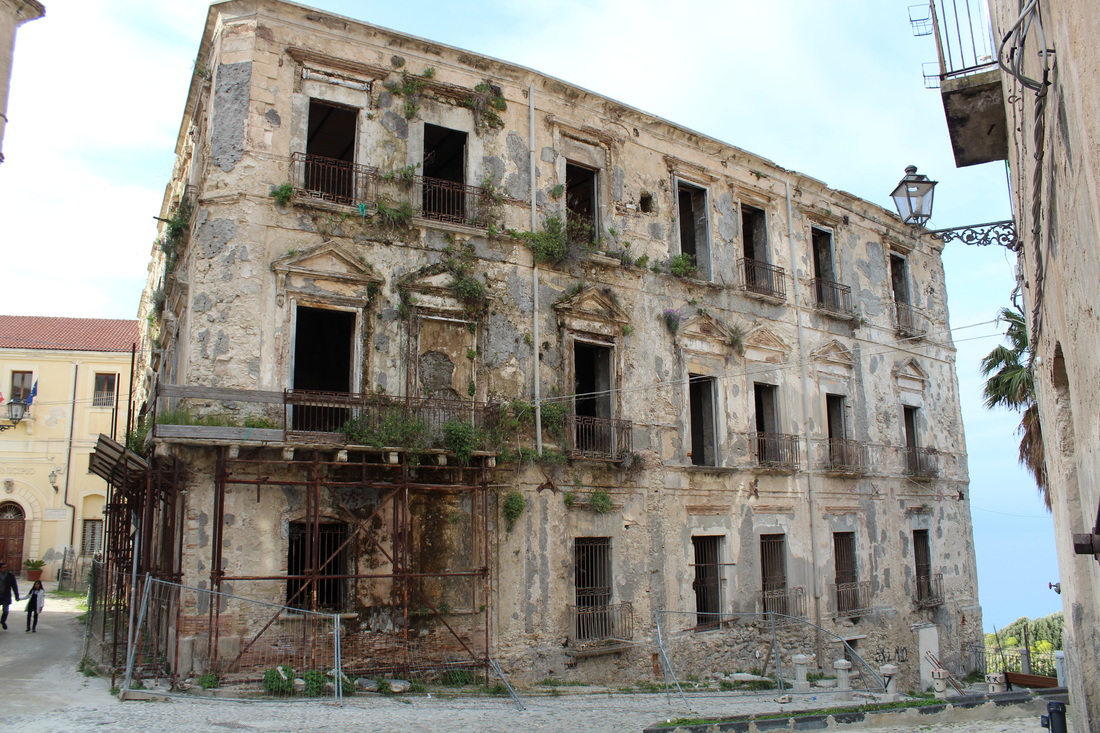
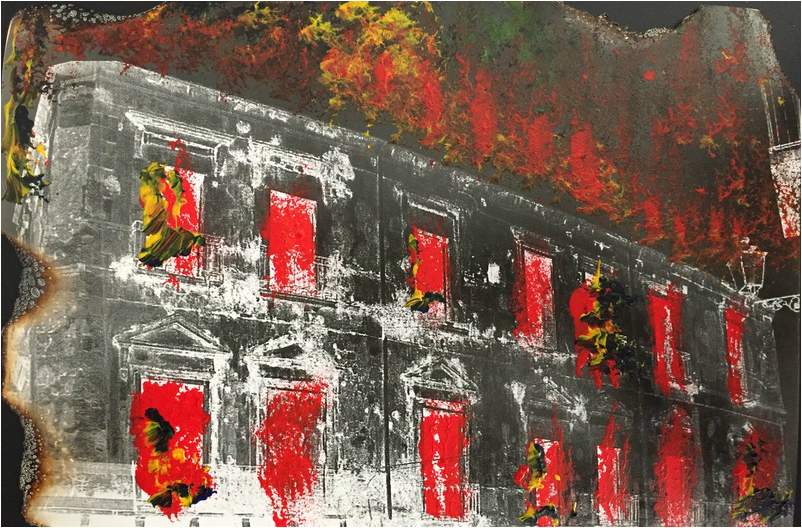
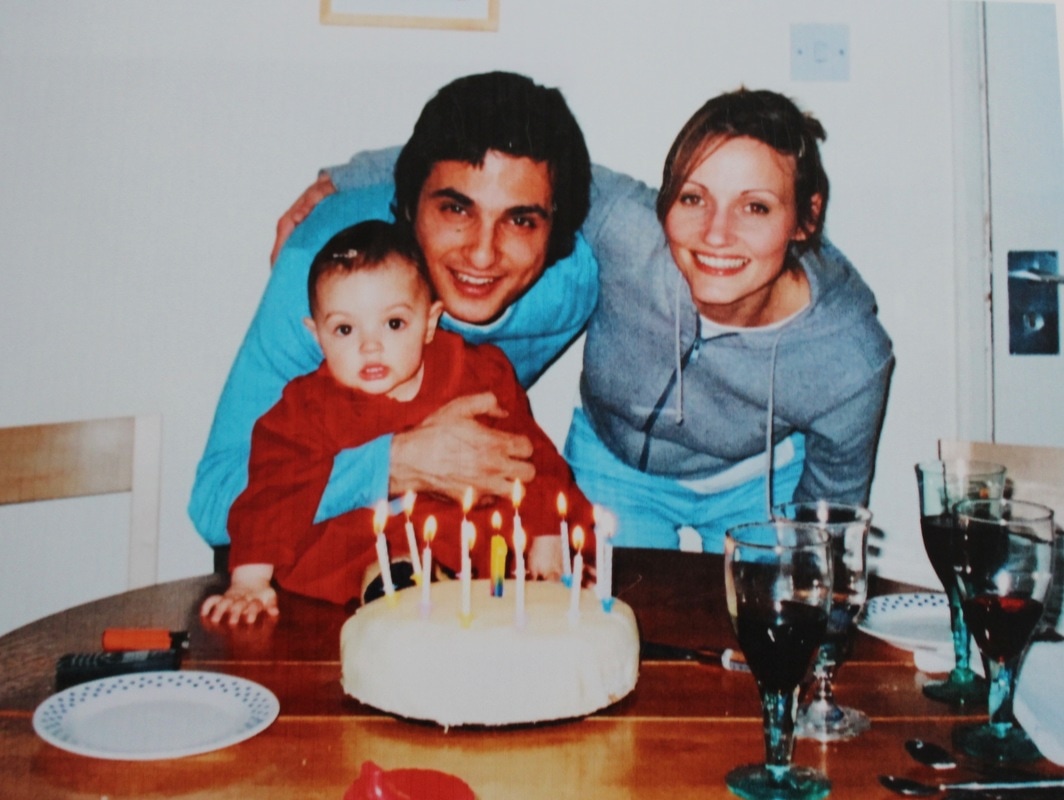
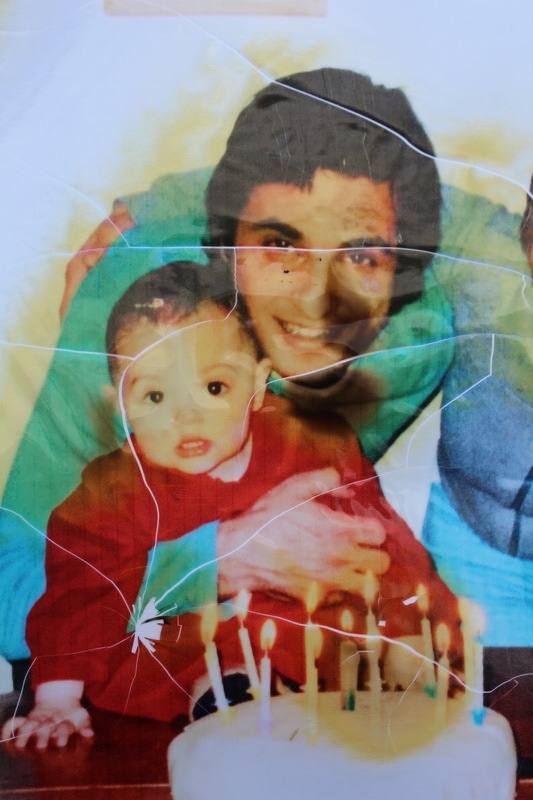
For my manual piece of work i decided to paint and burn the printed photograph. i mixed the colours red yellow and a slight green int the image using a sponge to try and crate a fiery look. i then decided to play along with the "burnt down house" effect which is when i decided to burn the edges to create a more physical effect.
Photoshop Development
For these responses i used Photoshop to create my abstract images with the house. Here are some of my results. I used different techniques to create looks such as glitching, moulding, creating double exposer
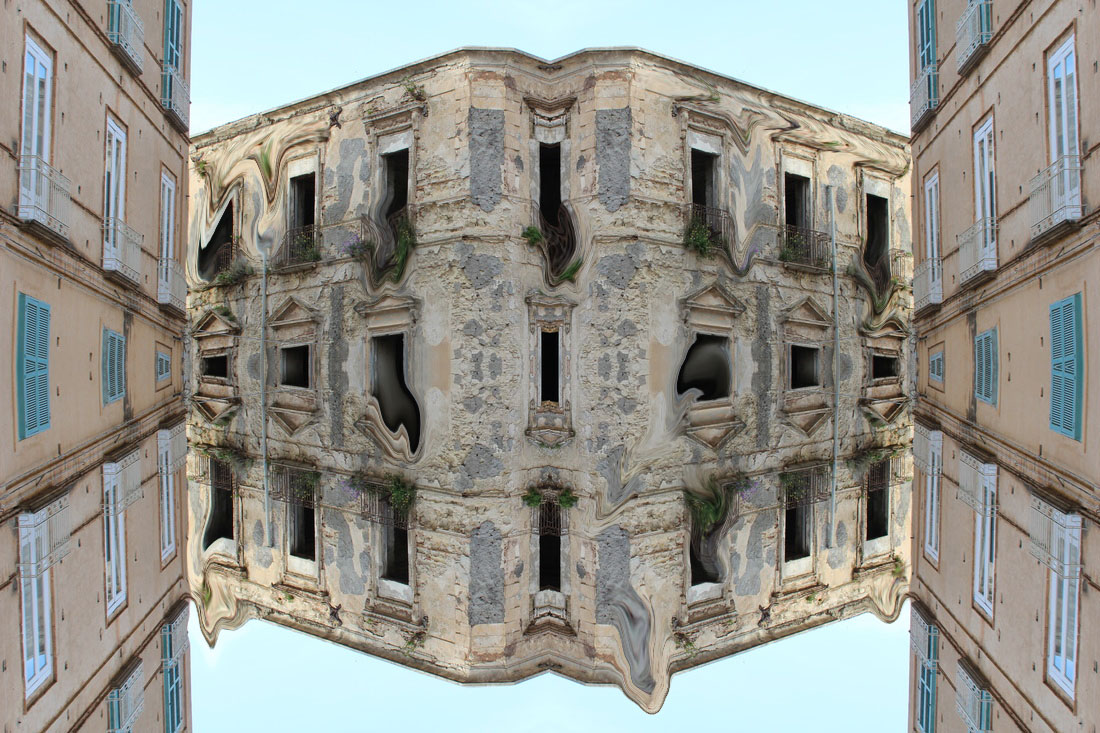
For this edit firstly i mirrored the image 4 times. I thought this would look effective as it would bring a different perpective to the image rather than just a building. i then used the liquify tool and melted the windows. i think this made the photograph look more eerie and abnormal. i like the way all the windows are smudged however to make the image look more abstract i could have dimmed the lighting and made the image have a subtle yellow tone in it.
I decided to glitch this edit. To do this i used the single line marquee tool and then i changes the colours in the glitch by turning of different channel colours in the layers column. I think this effect is effective as the colours are vibrant and bright which links to the time the image was taken (in the summer)
This image is more simplistic than the others and i thought that only editing a quarter of the image would make it look more abstract. i first double exposed the image and selected quarter of the image and dissolved the layer.
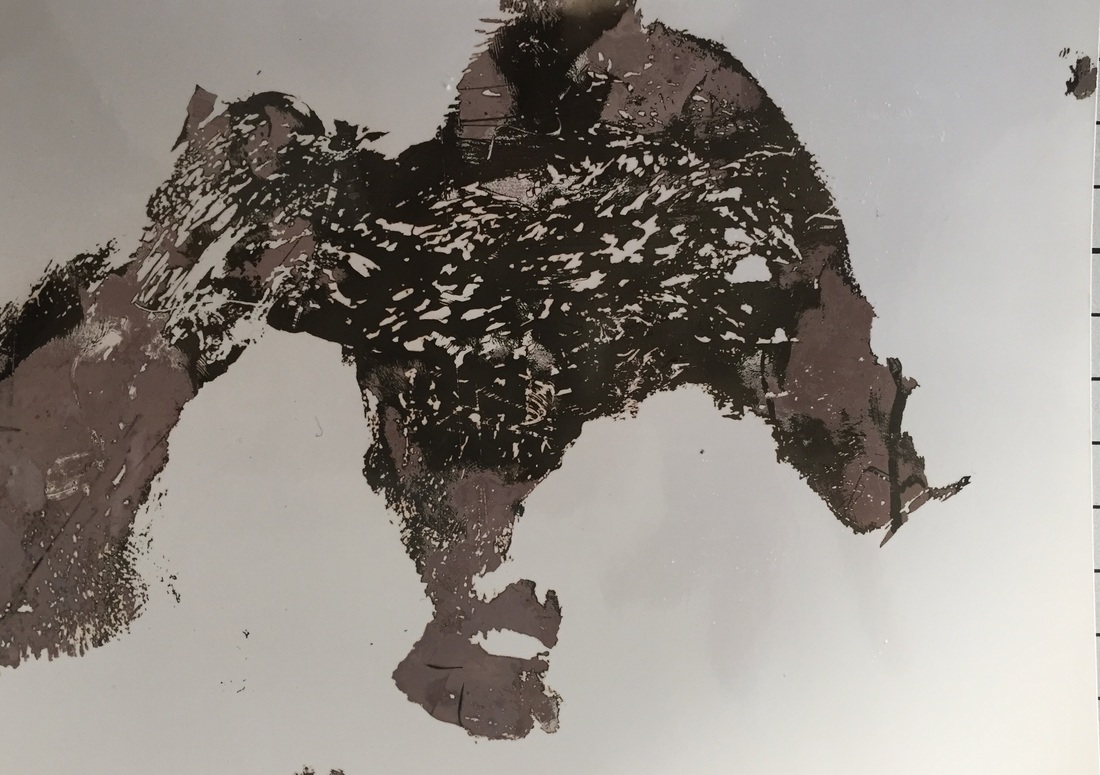
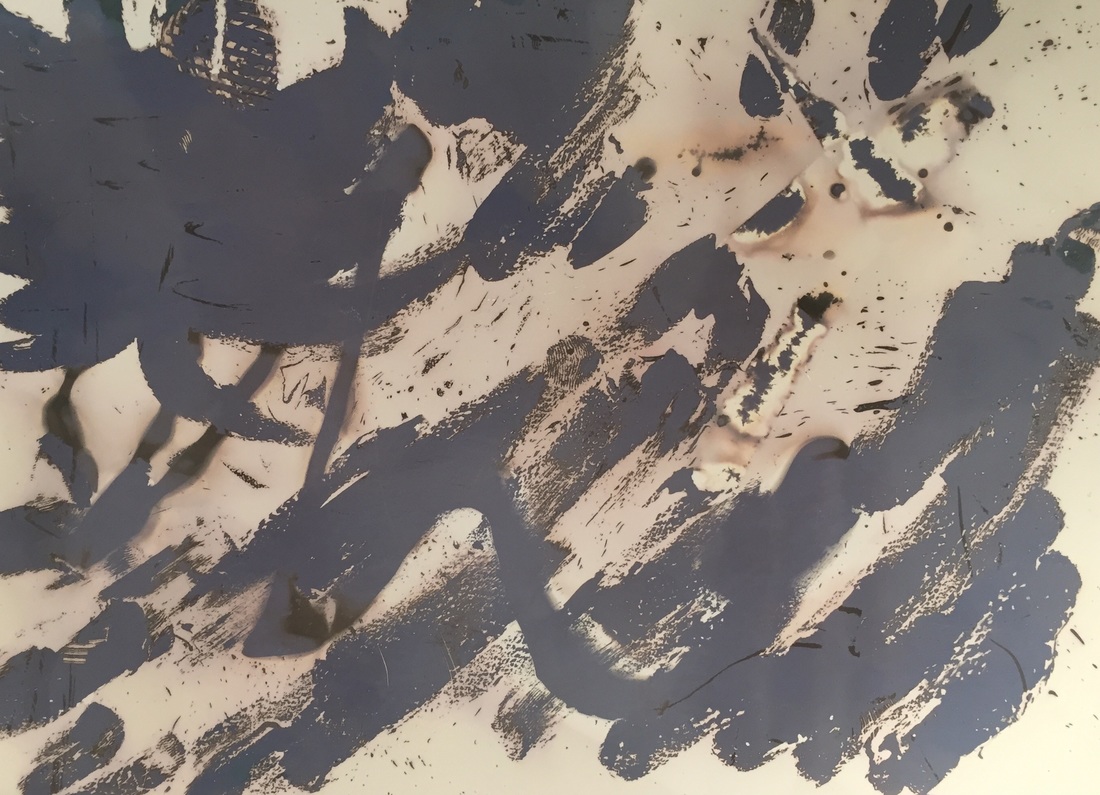
CHEMIGRAMS
To create these images we we poured various liquids onto exposed photographic paper. i used things such as Nivea cream, honey and tape which created different shapes and effects. We then experimented with placing our Chemigrams in and out of the developer and fix, the developer changes the paper to black and the fix to white, this meant that we could control the outcome of our work and how things appeared when they were exposed. After the chemicals effected the paper which often took around 2-3 minuets, we took the photographic paper out, rinsed the liquids of and fixed the image, once again.
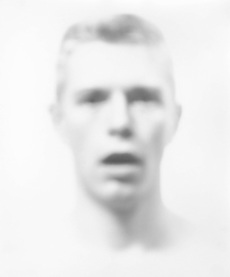
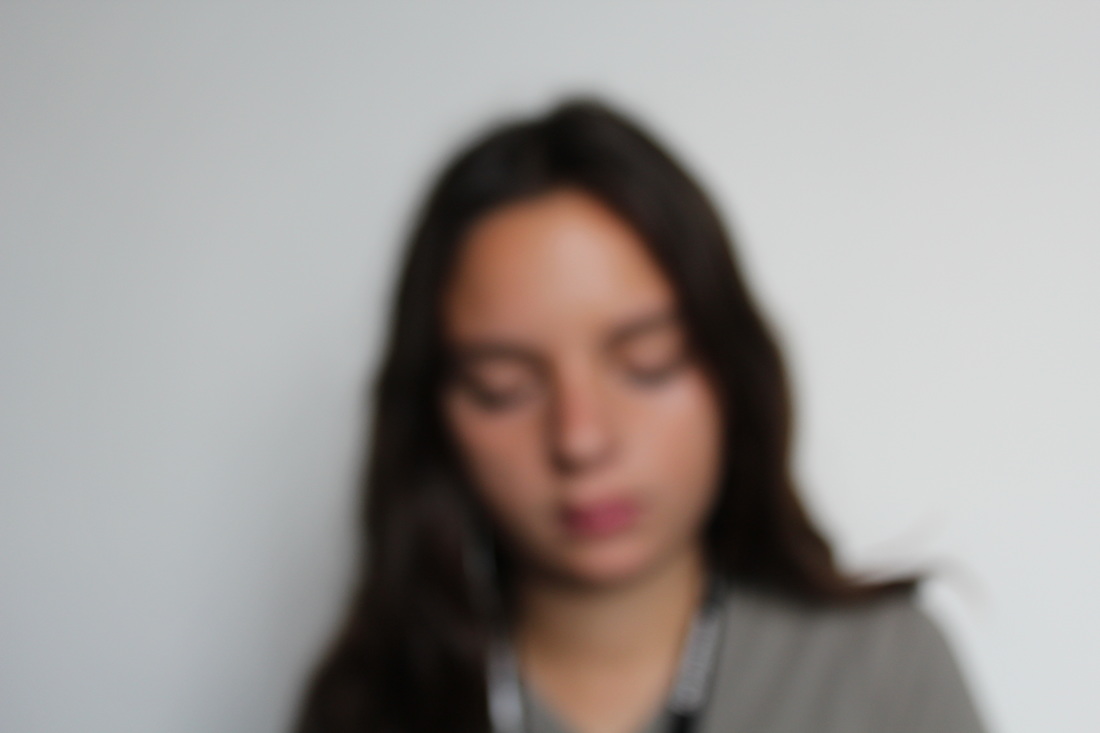
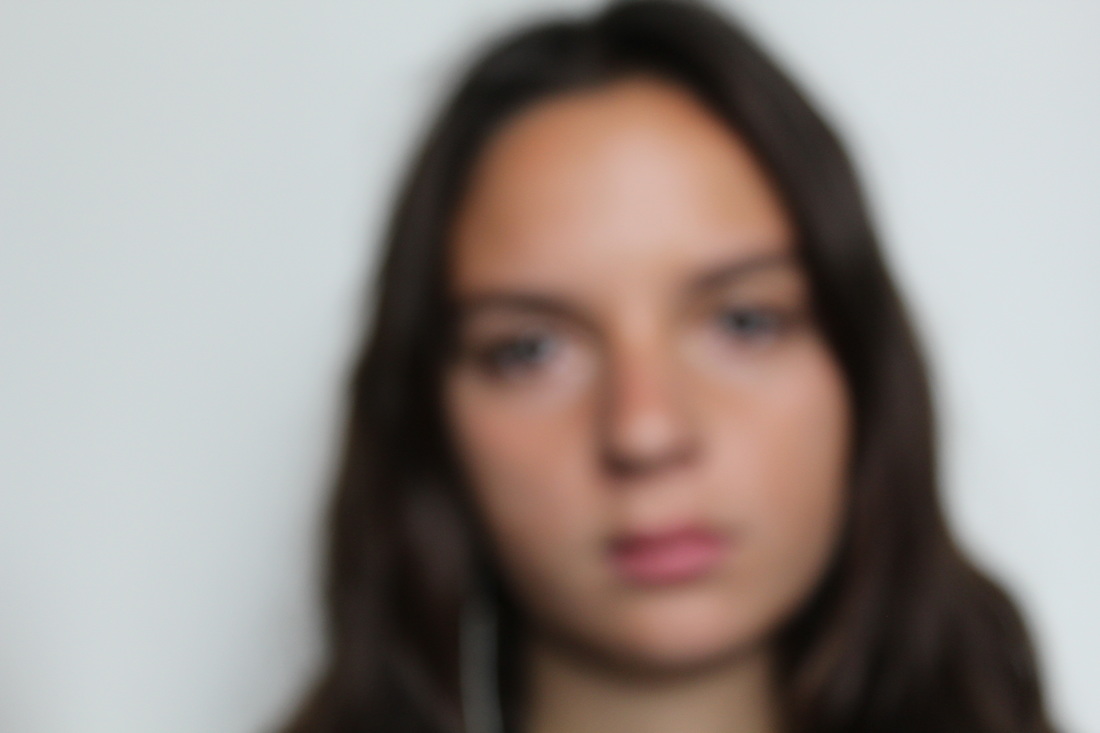
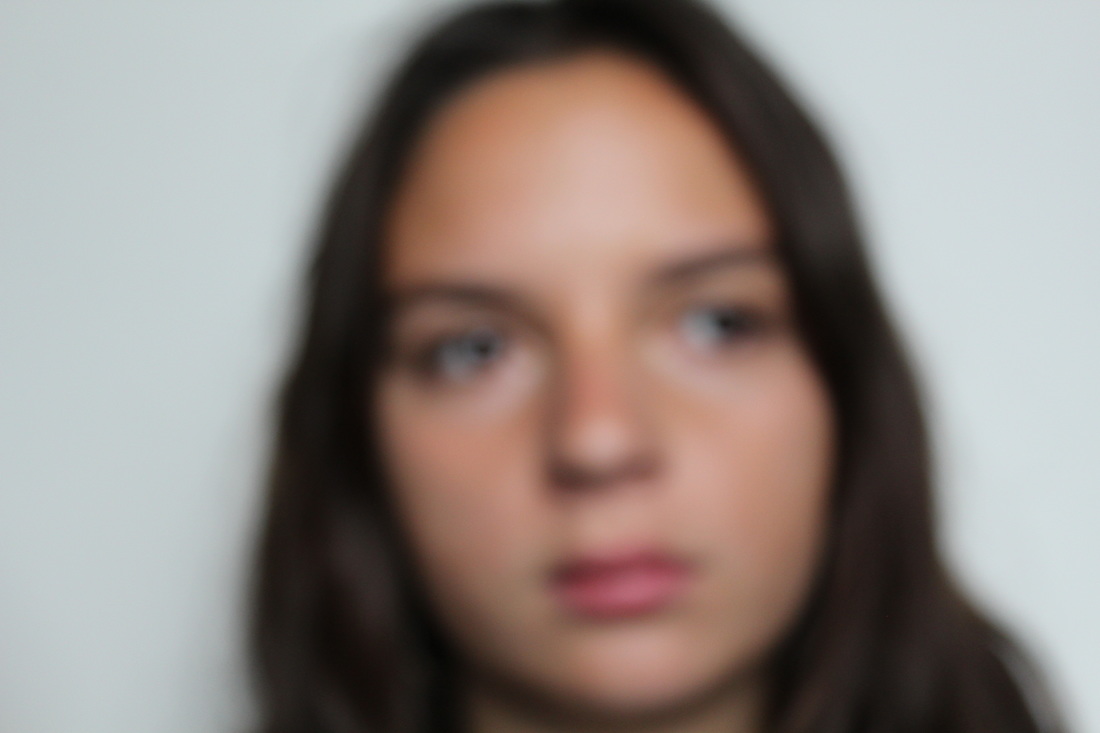
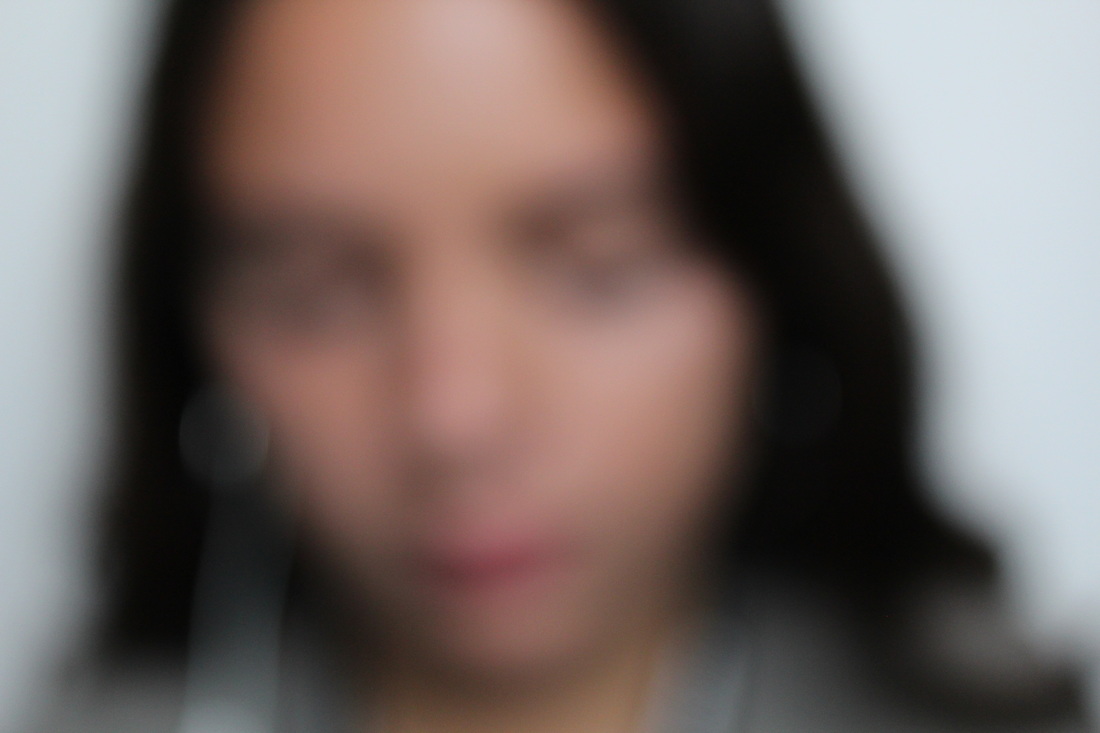
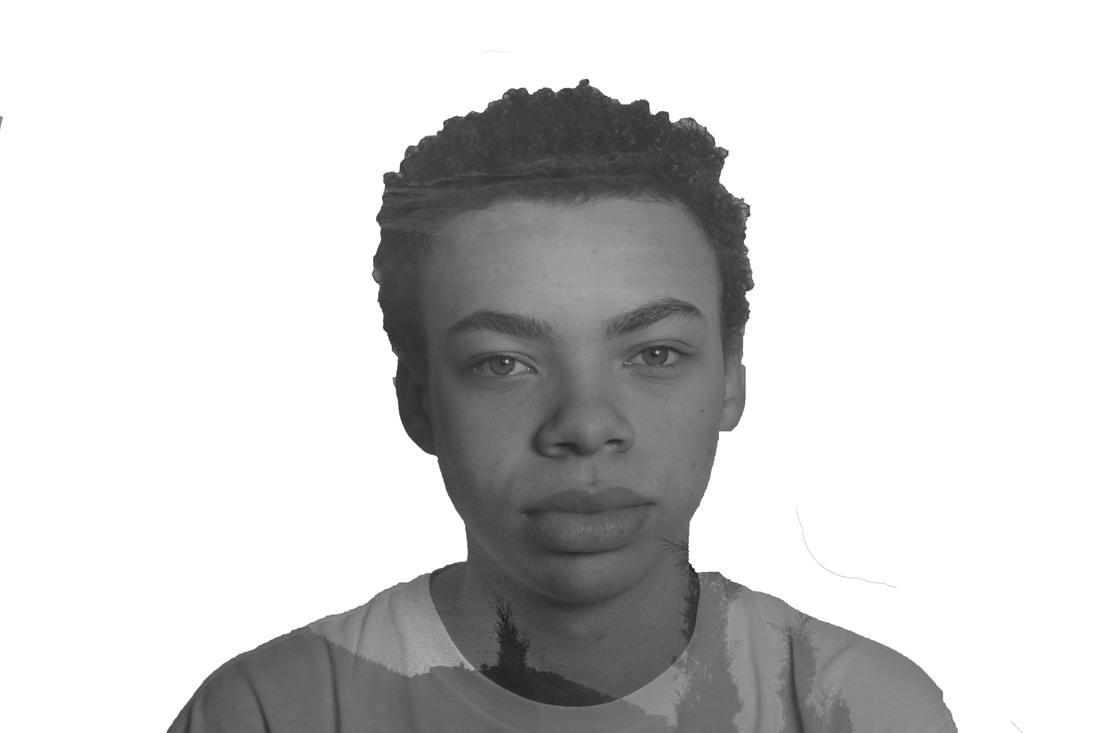
ABSTRACT PORTRAIT
Bill Jacobson
Bill Jacobson is widely known for his out of focus photographs of both the figure and the landscape. He began his signature, indistinct images in 1989, and has since been exhibiting in galleries and museums throughout the US and Europe. He uses manual focus to make his images blurred and a high IOS which is what makes his images so light. I like the fact that he changes his images to black and white as i think it makes them look more abstract, and the shadows and different tones create the detail in the image.
|
|
|
He is considering the aids epidemic of the early 1990's in the images above. This is depicted by the obscured, blurred style of the photographs which illustrate the effect aids had on people. Jacobson was interested in the 'layers of time' and he wanted there to be direct parallels of the illness of that time period. He was interested in this issue as it effected a huge amount of people. Interestingly, during a studio visit a doctor claimed Jacobson's images reminded her of her patients who were dying of aids. Linked to this Jacobson is also exploring the idea of loss and mortality. Jacobson creates very simple photographs which convey a deeper meaning, he does this by creating monochromatic images, which have simple backgrounds. this is effective his photographs are simplistic and clear which gives his audience a straightforward understanding of his intentions which is to present illnesses and issues in a different way to most photographers, which he was successful in doing.
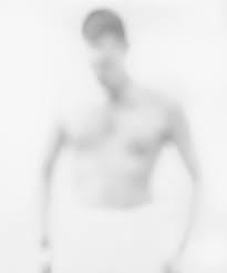
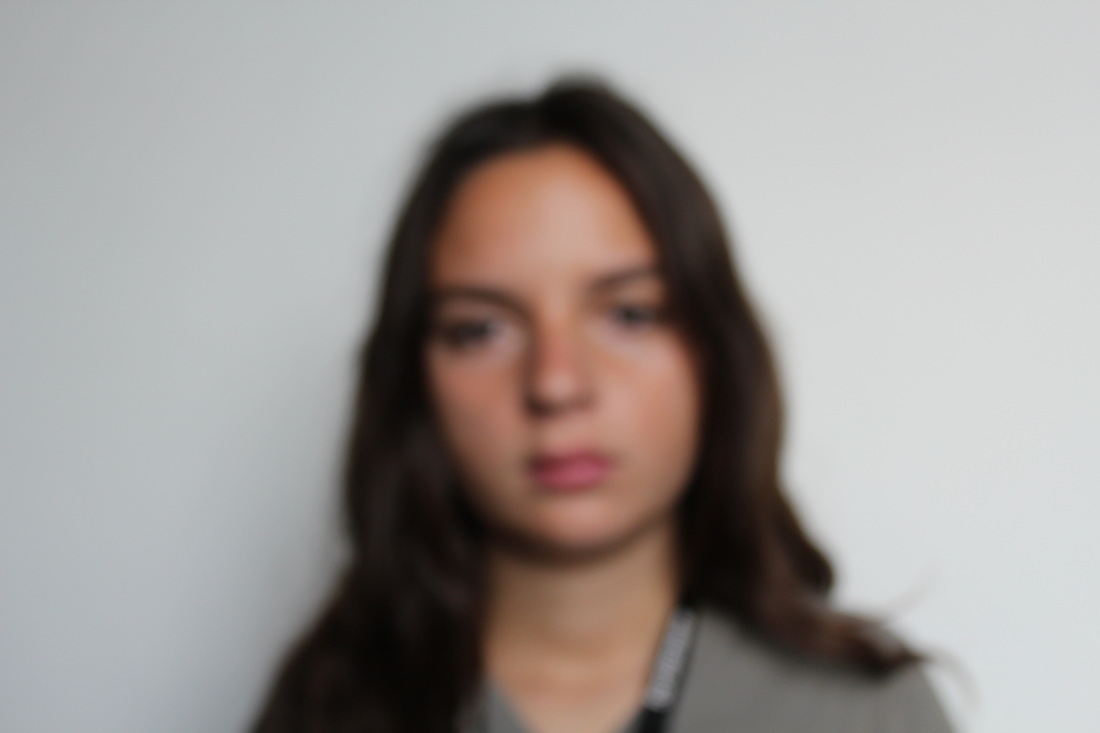
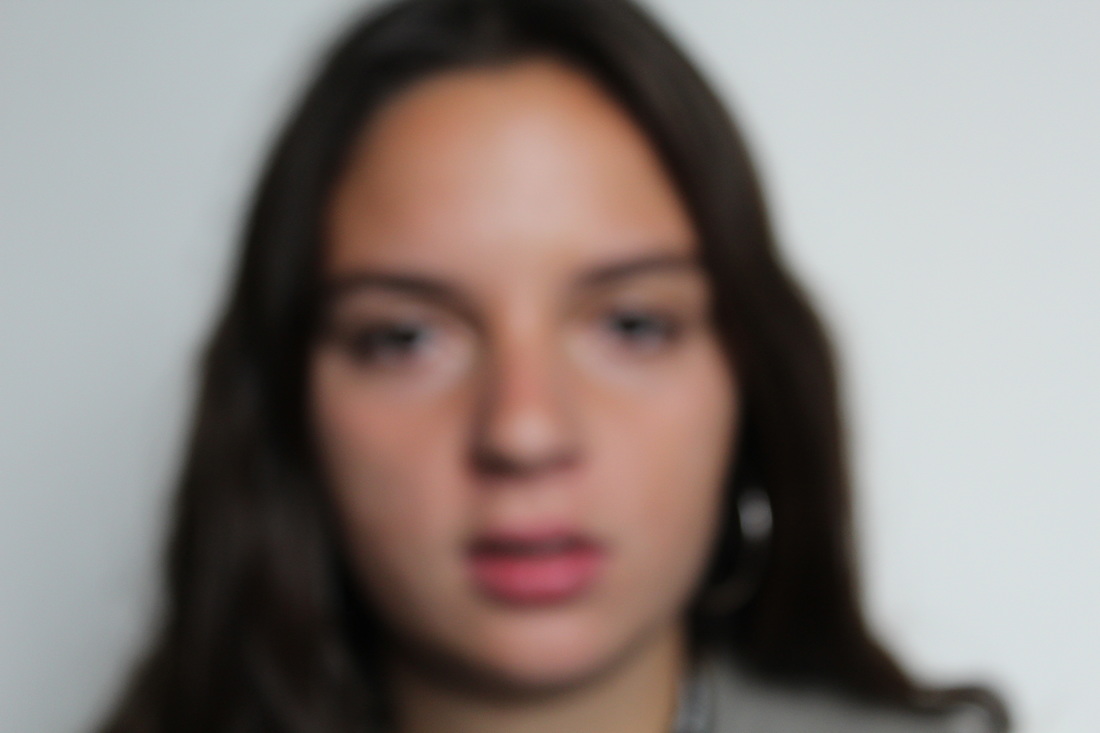
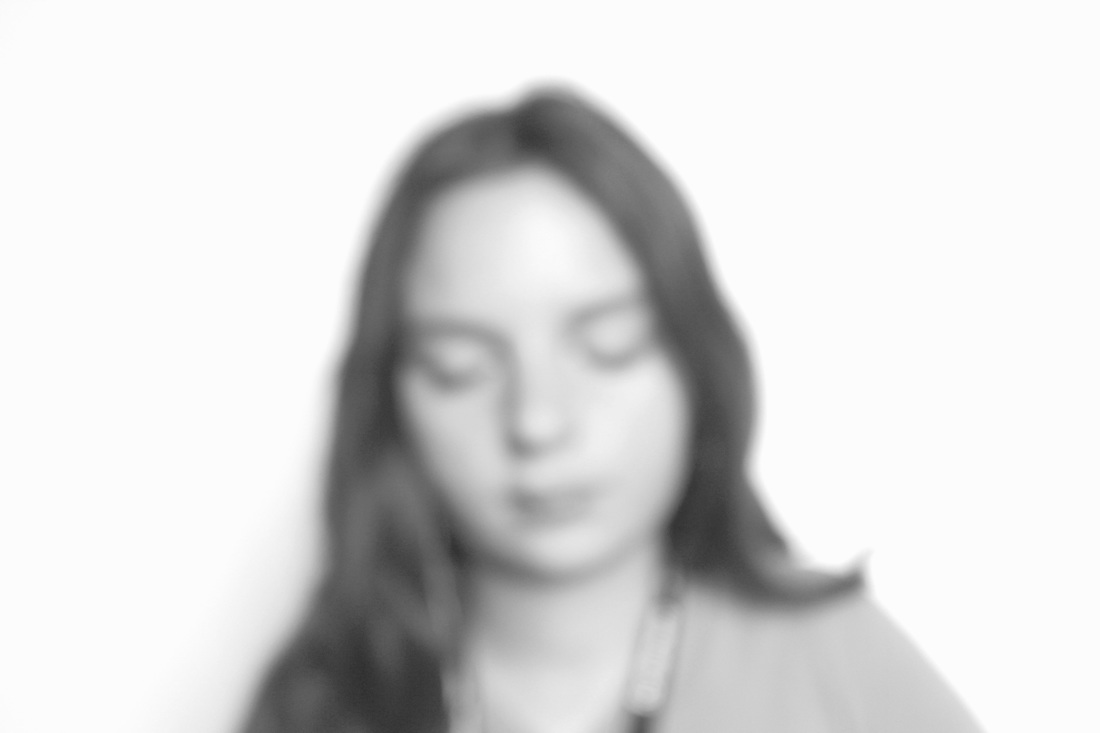
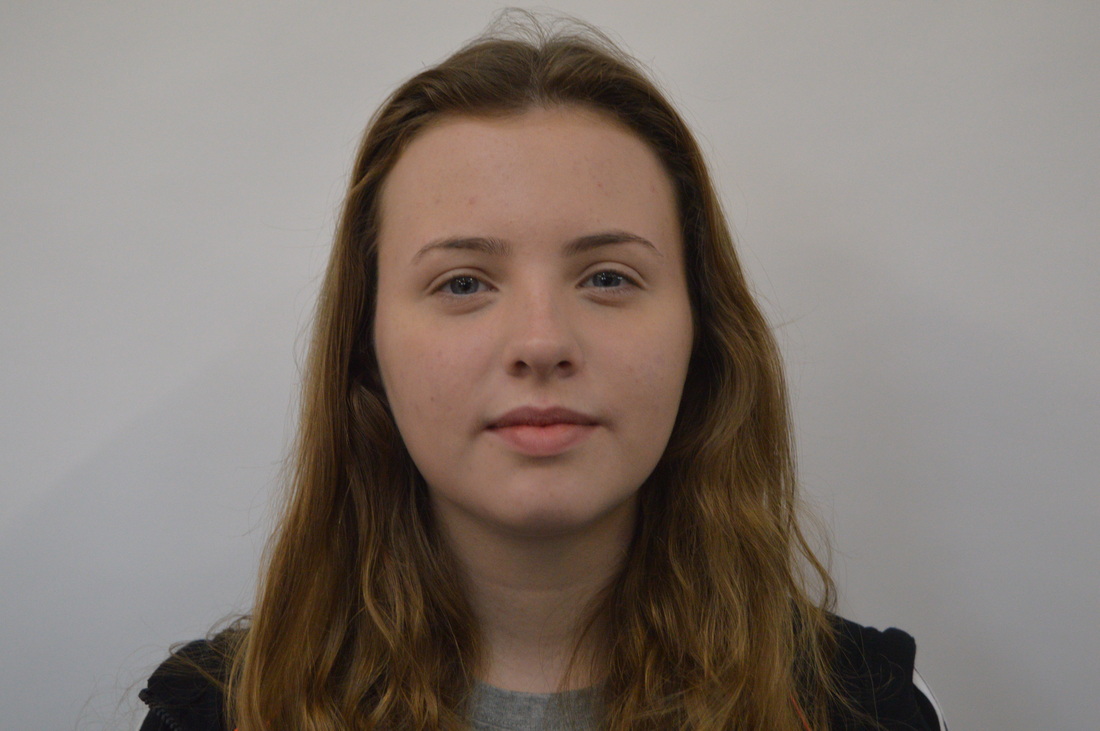
MY RESPONSE
To create these images i used a tripod and set my camera to manual focus so that i could manage how blurred the outcome could be. i shot a range of close up extreme close up and landscape shots to see which worked best and this also helped me show off the different facial expressions. i like the way the model i used looks upset as this creates a new emotion to the image and suggests the blur might mean she wants to hide her feelings.


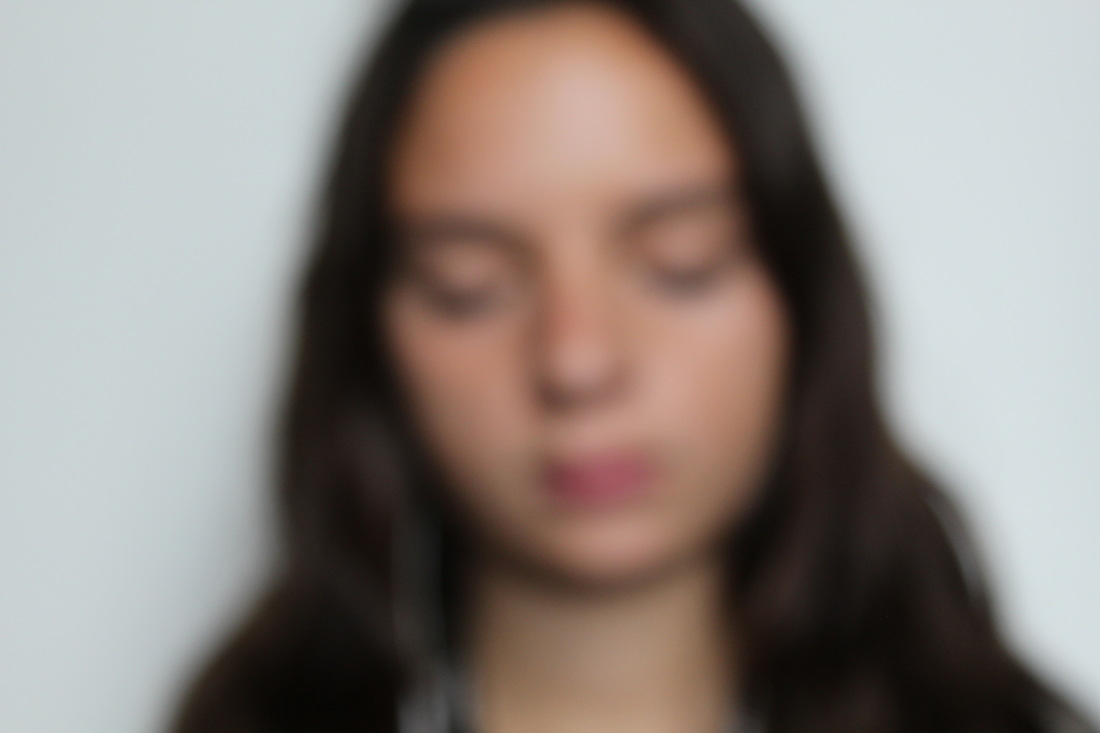
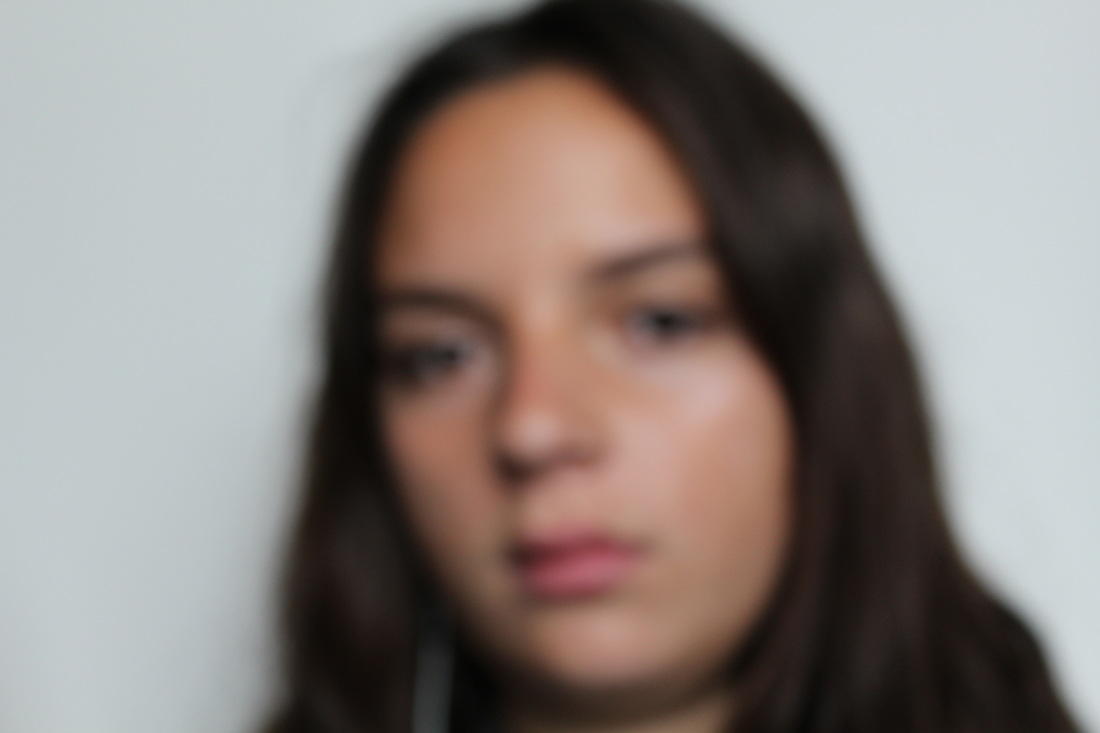
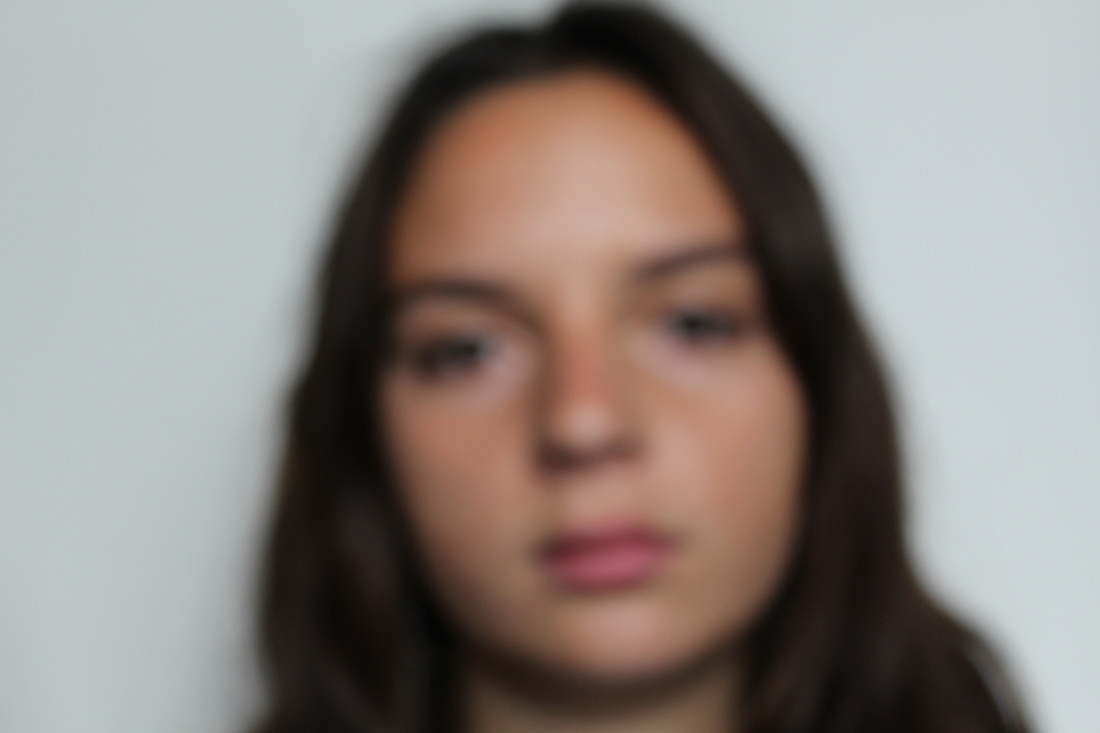
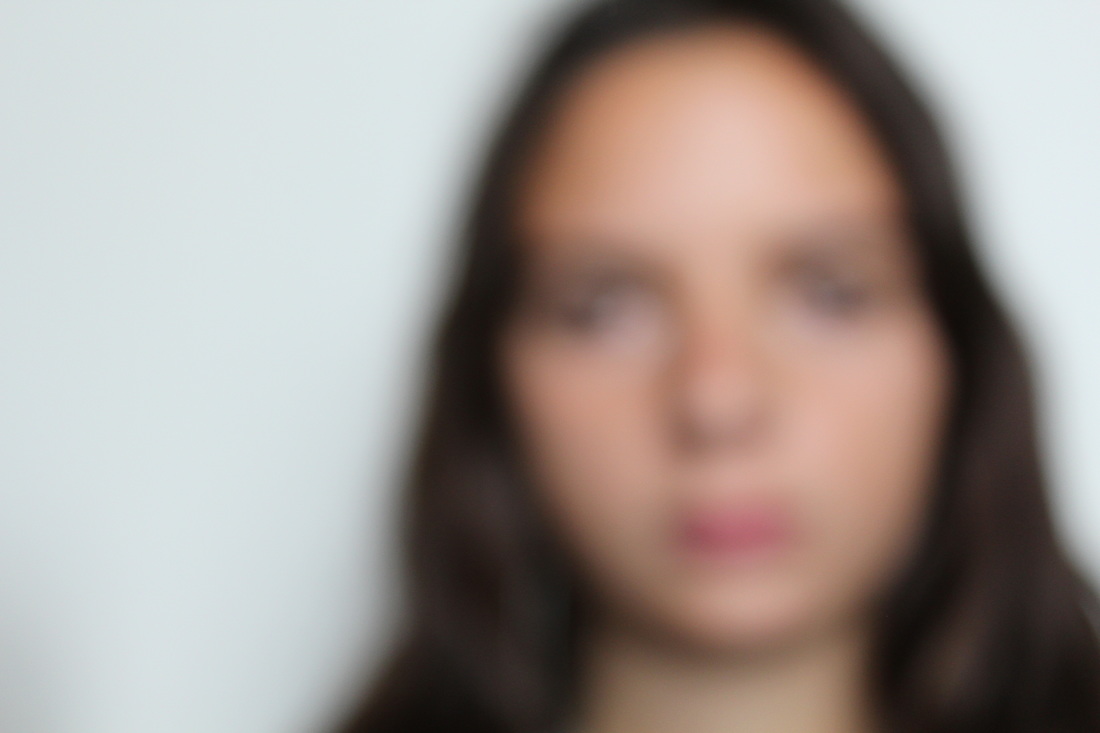
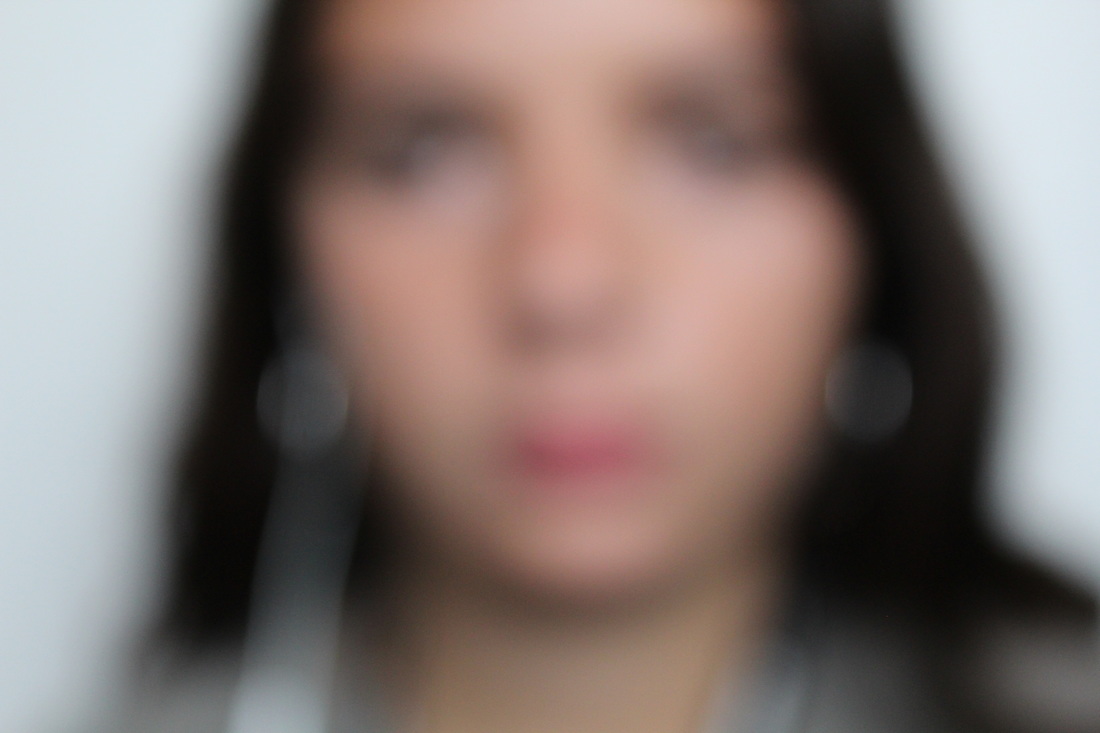
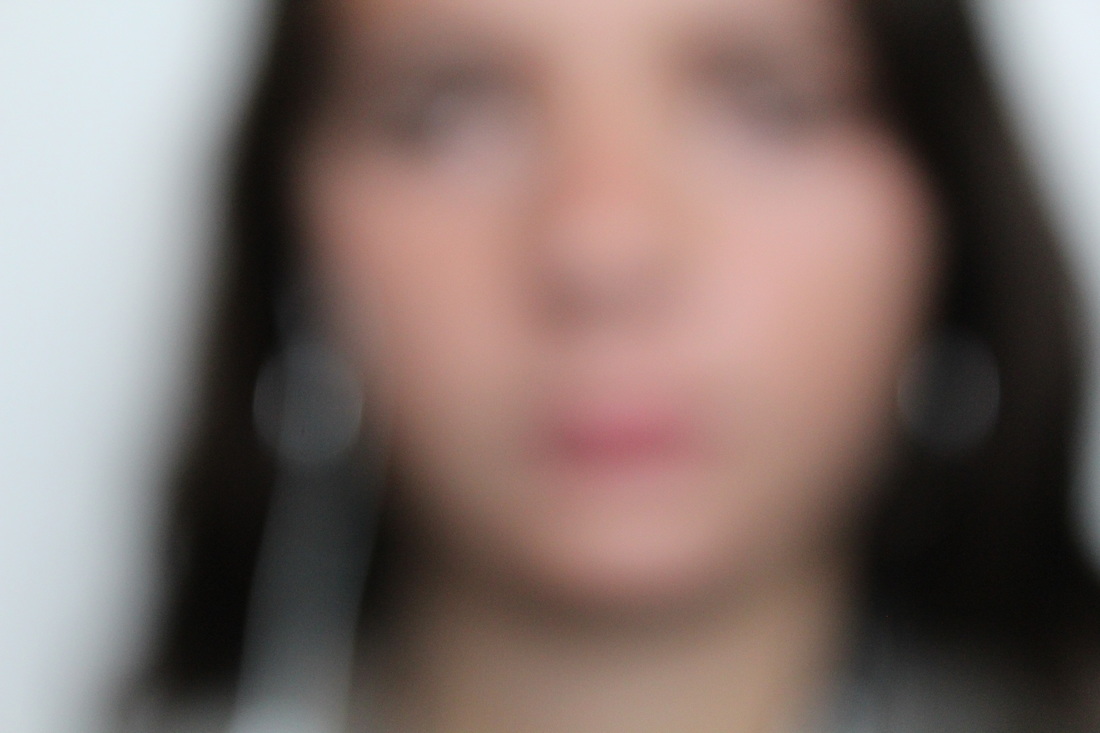
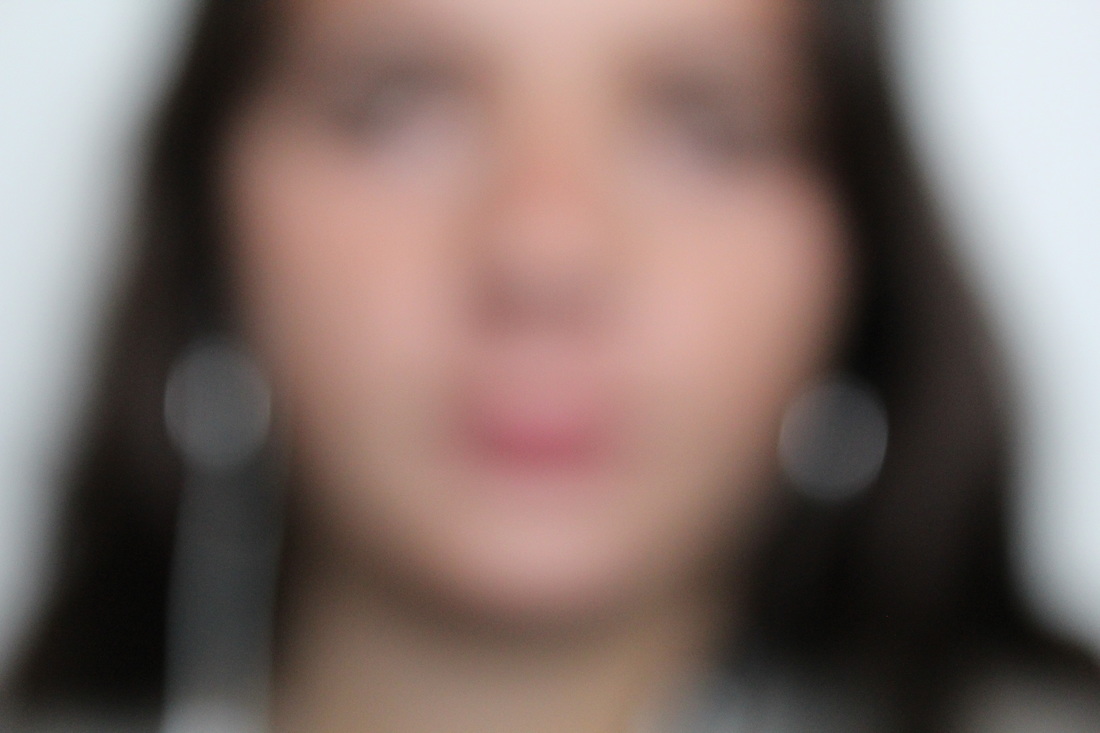
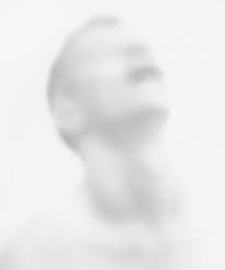
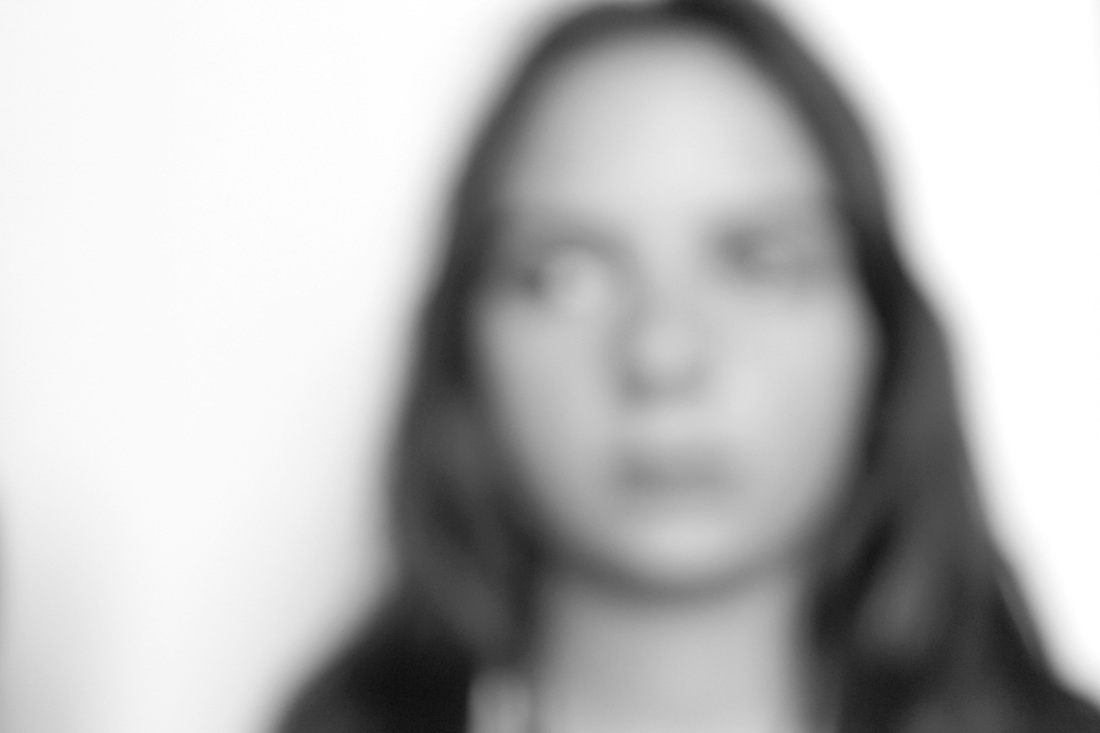
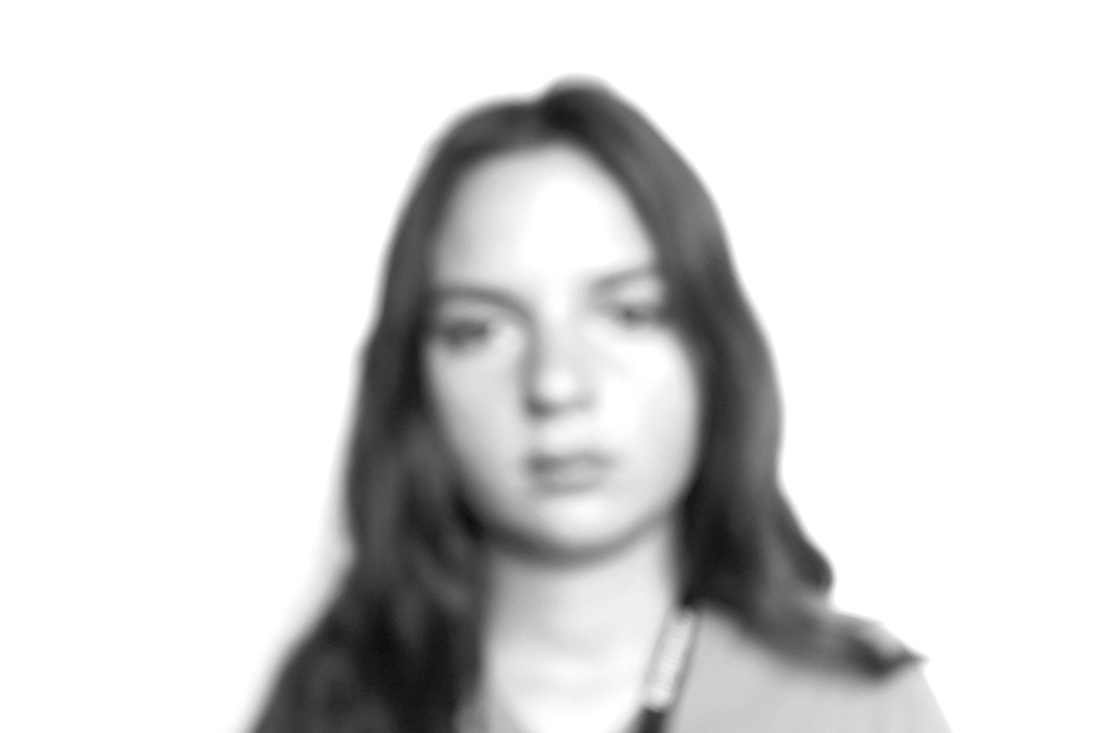
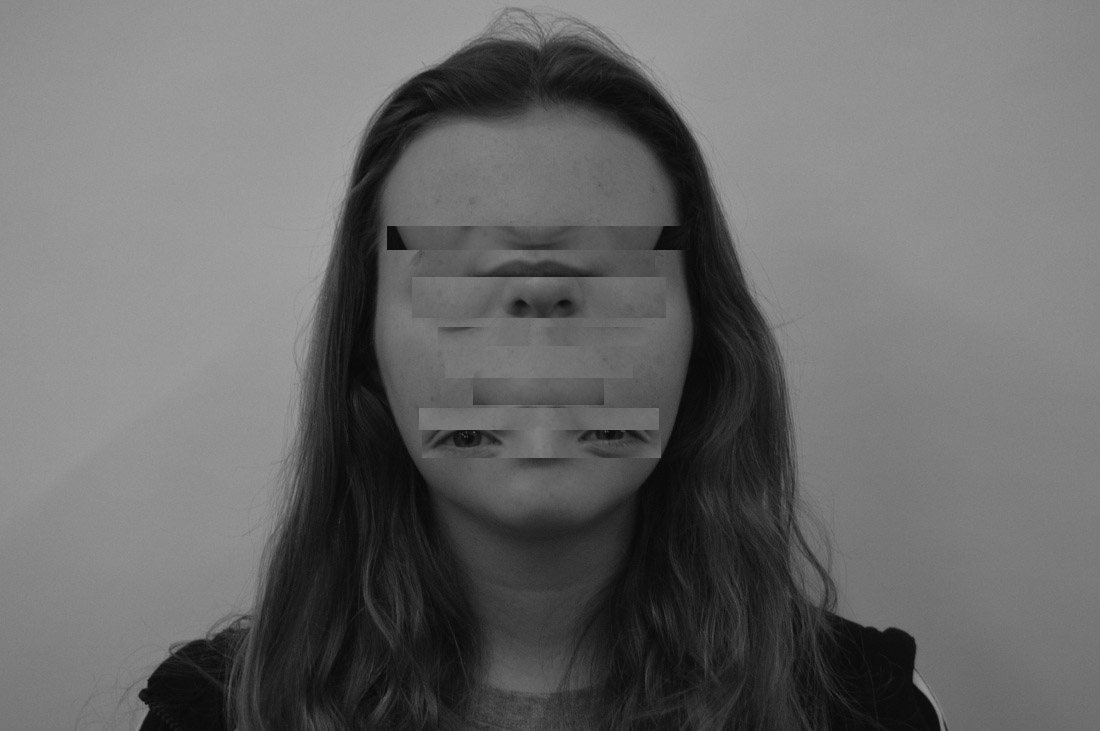
SECOND RESPONSE
To create these images i played with the layers in Photoshop. first i changed the grey scale to completely black and white. to create more of a contrast and to match Jacobson's work. playing with the layers help increase the lightness and decrease the shadows of the image to make the contrast less which made i look even more blurred. To improve these final images i could have used a girl or boy with blonde hair, this would have immediately created a false effect of making the image look brighter.
|
|
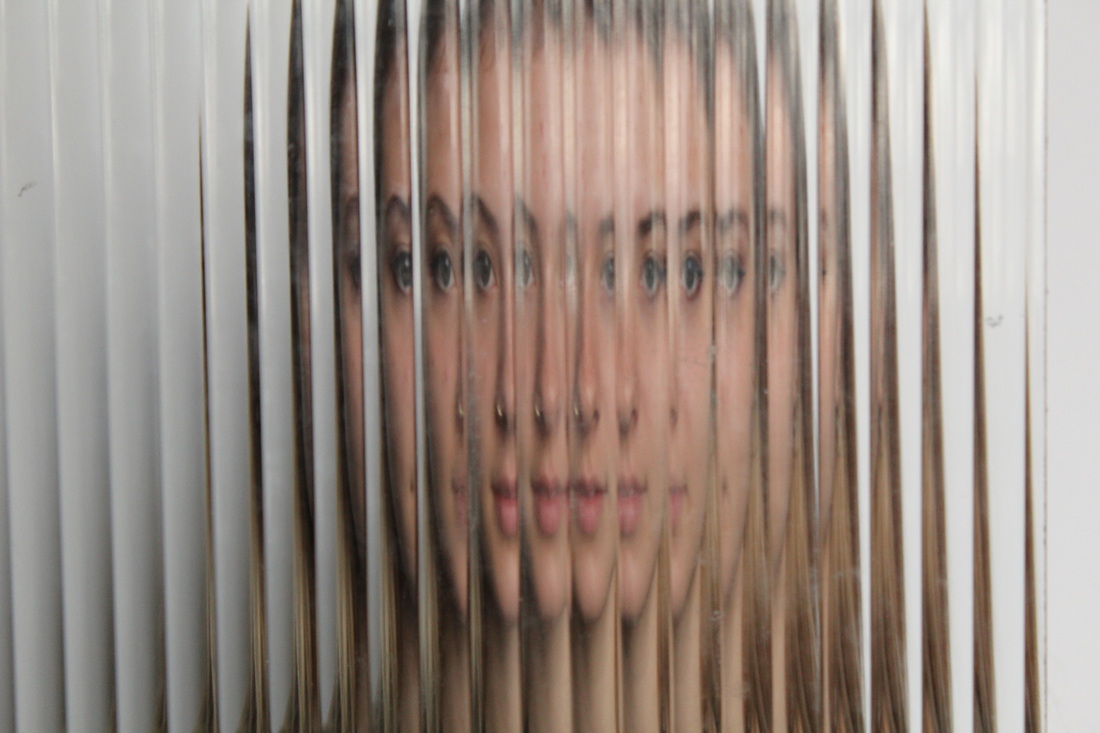
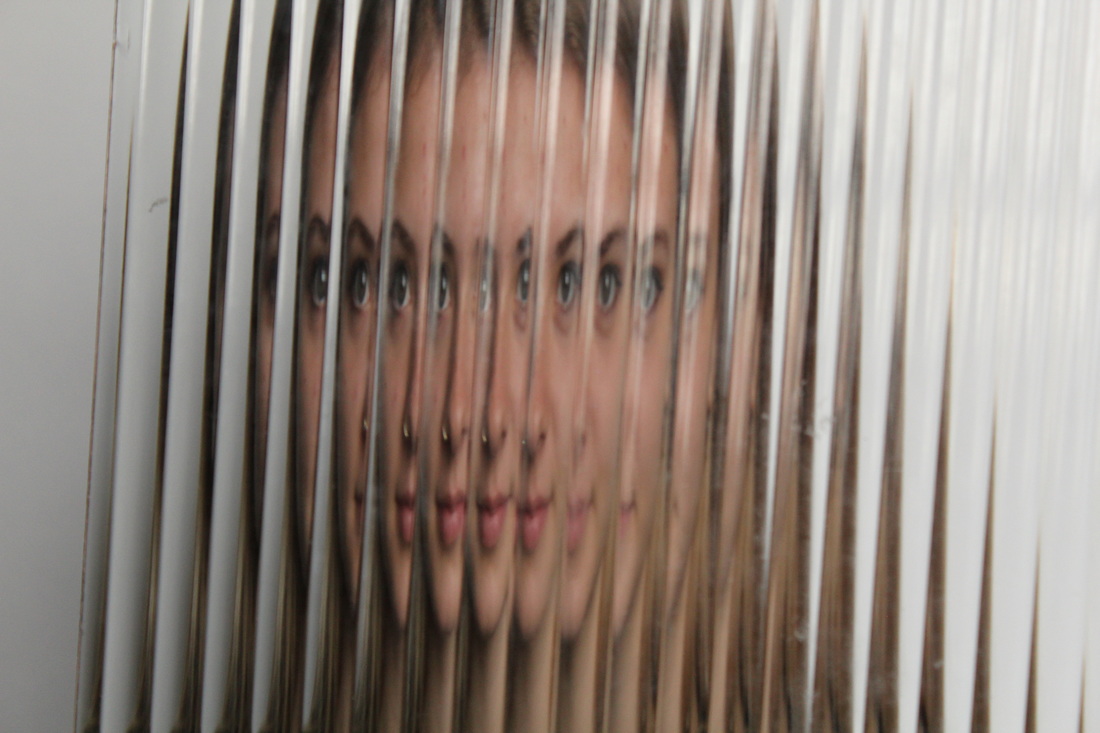
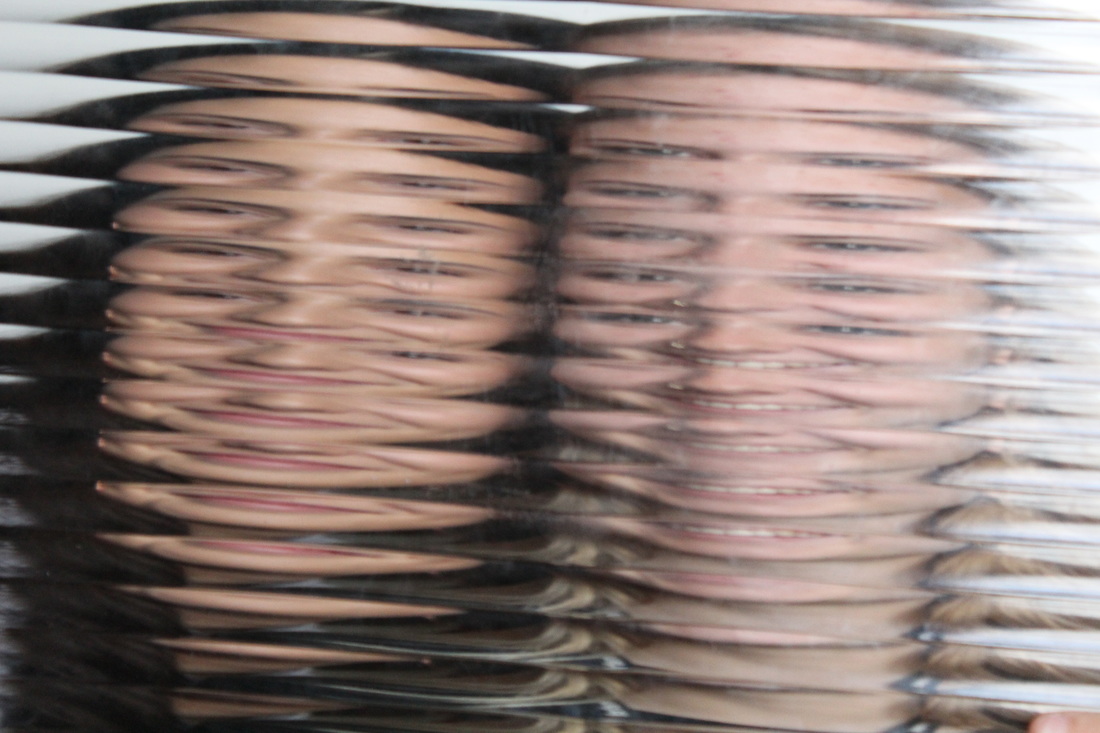
ERWIN BLUMINFIELD
Erwin Blumenfeld, regarded as one of the most influential photographers of the twentieth century. An experimenter and innovator, he produced an extensive body of work throughout his thirty-five year career including black and white portraits and nudes, celebrity portraiture, advertising campaigns and his renowned fashion photography. Born in Berlin in 1897, Blumenfeld drew early inspiration from the Dadaists, incorporating experimental techniques like solarization, multiple exposures, and photomontage into his darkroom practice. I found this part of his work very interesting as he used a range of tequniques from different inspirations around him so that he is able to capture what he is looking for and wants.
This is one of my favourite images from Bluminfield's work. i like the way he's kept a 3 way colour code, as the red in her dress lips and nails really stands out and makes the image pop out and catch the eye easier.
|
I like the way he has used flower prop in this image. i think this may represent a personality or feeling of the girl in the picture, the image also looks very abstract in the way her legs are positioned.
|

This photograph captured my eye as it is in black and white. The shadows in the image create the detail. and gives us a sense of the dark mysterious mood of the character holding his arm up high.
|
The fact that this inspirational artist uses models who are all preforming in a different way in the video created by him and seen, it may may suggest that Bluminfeld is showing off different kinds of beauty and is eager for us to take notice on how complex beauty and to define it actually can be. Blumenfeld has used a lot of mirrors in his film which replicates the subjects multiple times in one shot. This reveals that Blumenfeld is possibly suggesting that society deems there is only one form of beauty, and that everyone should just look the same. This is not only seen in his work, but is also represented all around the media and is becoming to familiar in some cases. Subsequently Blumenfeld other shots such as the ones of the lady holding a white flower illustrate a sense of hidden beauty. This shot reflects beauty that is not immediately recognised but can be seen at another perspective. Blumenfeld has used an effect in this part of the film that breaks the shot up in lines so you can't see the models face. This is effective as it supports the point that suggests not all beauty can be seen at a first glimpse, you have to look at it with a different at it from different angles.
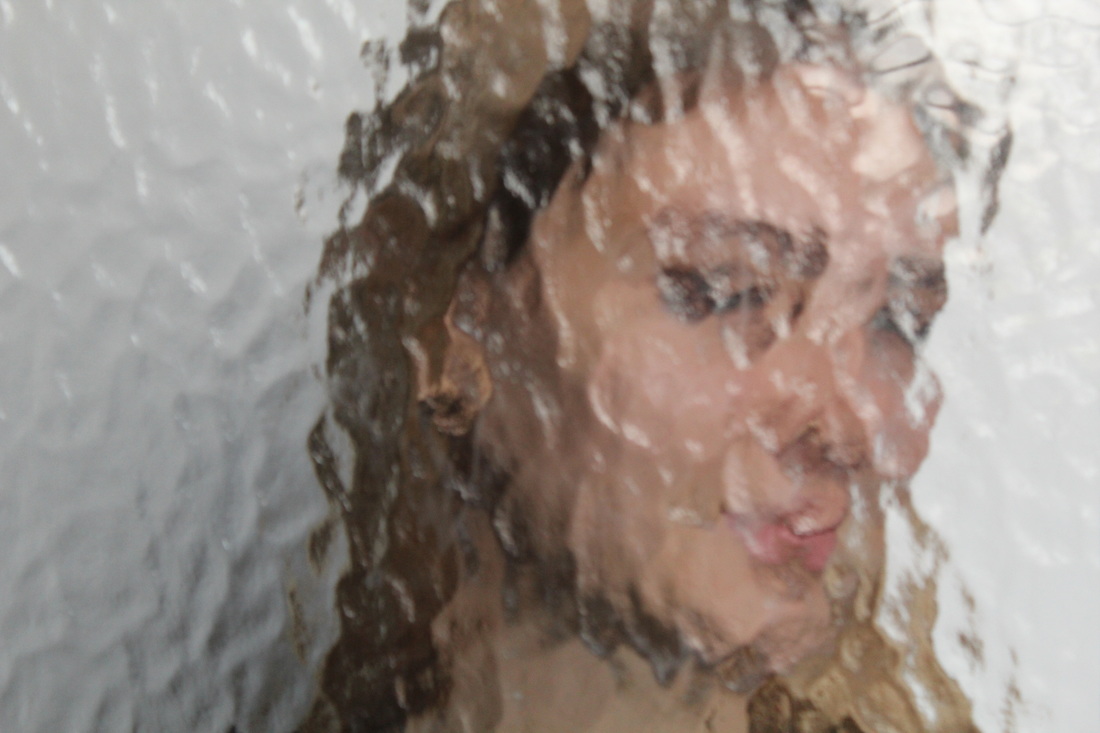
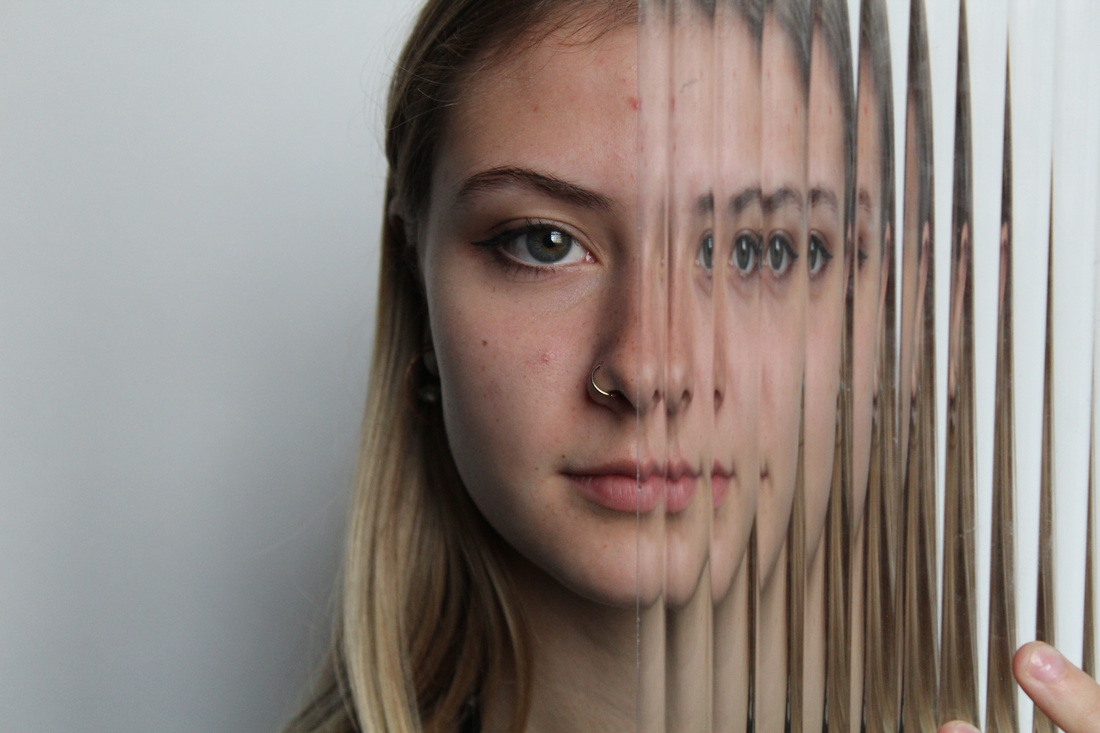
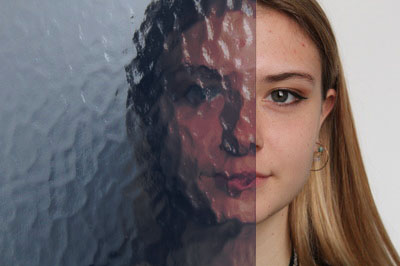
MY RESPONSE
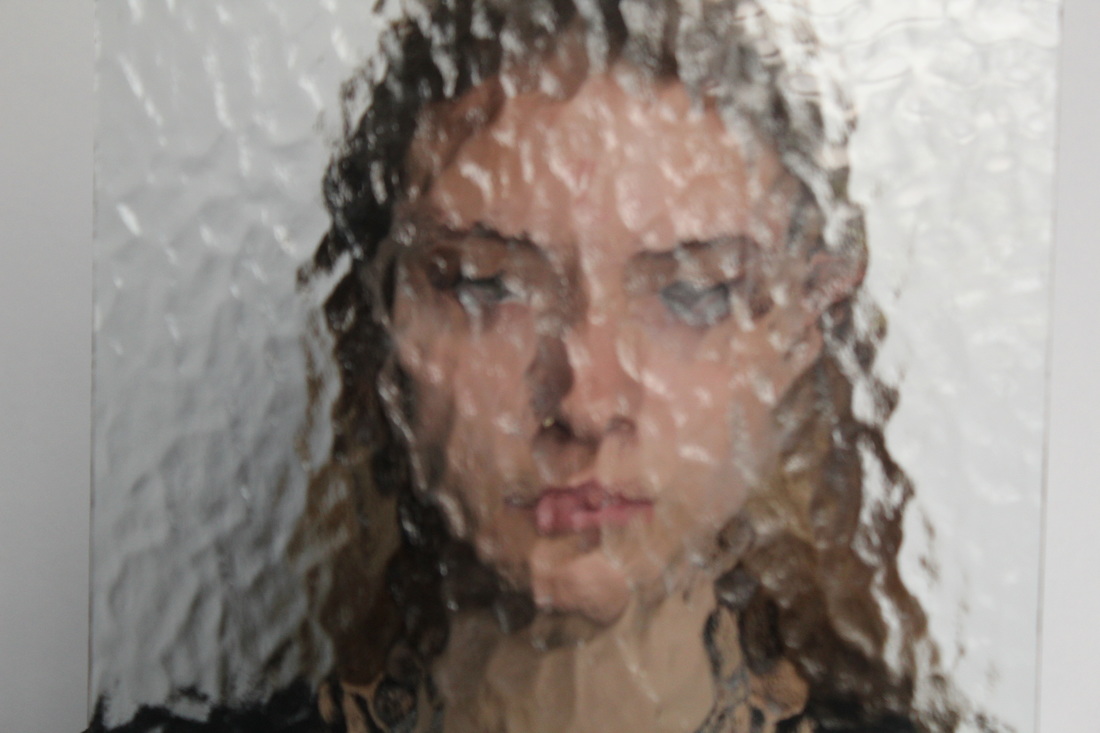
i used two different glass surfaces with different texture to try and create a similar look to bluminfield. i preferred the bubbled glass as although its different to Bluminfields work i think that the texture created by it look much more subtle and blurred.


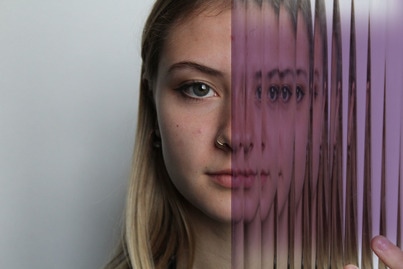
SECOND RESPONSE - photoshopped
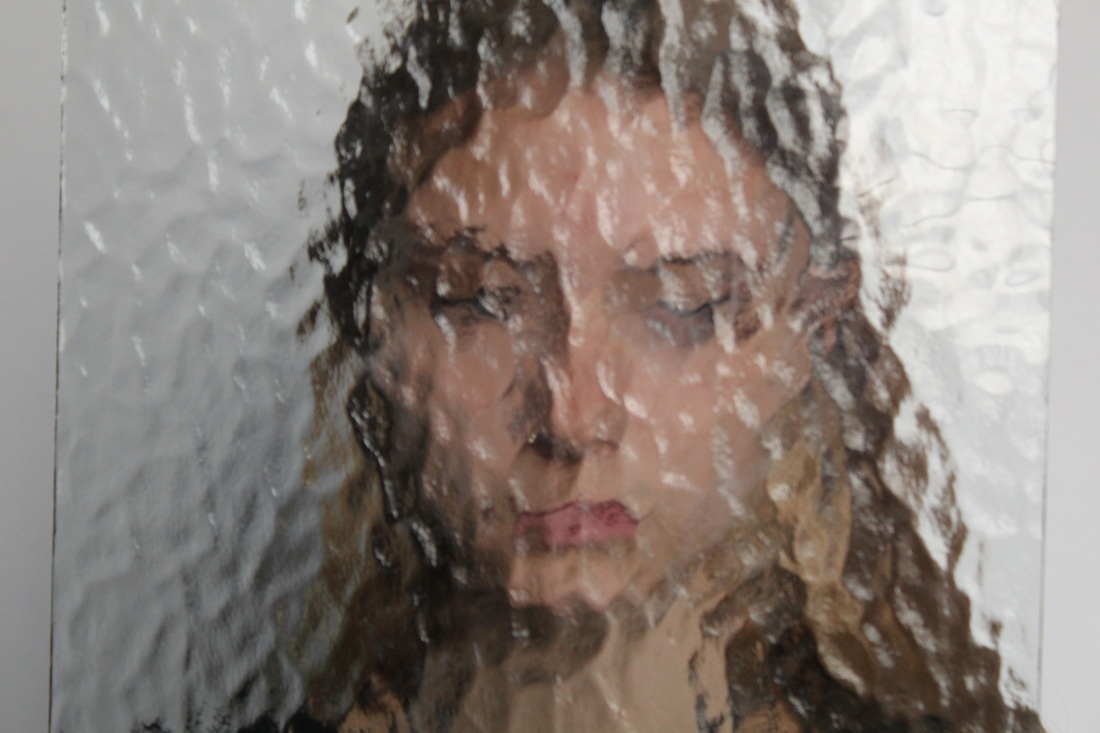
I used photoshop and played with the colours and textures of these images. For my first response i selected the textured area and changed the contour and colour overly to a purple and changed the opacity to 30%. For my second response again i selected the textured area of the image and selected the colour burn tool.
|
|
Street Abstraction
Saul Leiter
An American photographer and painter whose early work in the 1940s and 1950s was an important contribution to what came to be recognized as the New York school of photography. His work is in the collections of many prestigious public and private collections. We looked as letter's street work as inspiration of what could be made abstract from ordinary objects. Saul Leiter is known for his pioneering role in colour photography. He intended to create free, artistic shots through street photography. His photographs document everyday life of people in New York. Leiter manages to transform ordinary street scenes using unique framing devices, which adds an element of mystery to the photographs in his collection.
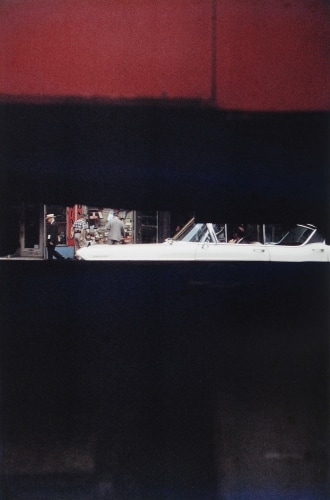
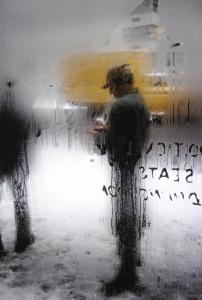

These three images are the ones i thought represent his work the best. They all show abstract points of the street life through glass and mirrors. Each photograph he takes shows a new perspective of live on the new york streets and shows us different ways people act and live, and the conditions they face. for example, in the first image out of the three we are shown through a small gap between something which looks like a bin. The gap reveals a luxurious car which shows the wealth of the city. However, on the other hand the second image shows the people living in poverty. As the image shows us a man who appears to be homeless, counting his change in his hands. which is shown through a dirty glass window, which gives the audience a sensitive outlook on the photograph.
My Response
|
|
|
FAVOURITE IMAGES
3 STRANDS
STRAND 1 - GEOMETRIC PORTRAITS
Gordin Magnin - Artist link
Gordon Magnin is a Nevada based artist who works on photographs scan collages and altered found images. his interests have intensive use of pattern and repetition. All of his work is very creative and interesting to look at. the different shapes and colors in his images make it more fun and less boring. Here is two of his pieces of work which i like the best.
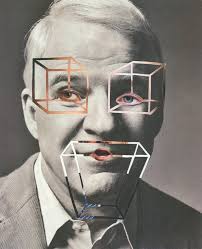
In this image, magnin has used the color of the real image to show the shaped he has made. i thought this look effective as the different tones of colour makes the image more imteresting and gets people to double look at the picture too see what he has actually done.
|
Here Magnin has used free transformation to move different parts of the models face around, and create patterns with her features. This is slightly different to the work on the right, as the shapes have been moved around and not drawn with the eraser tool to let the real colours come through.
|
First response
|
Before photoshop
|
After photoshop
|
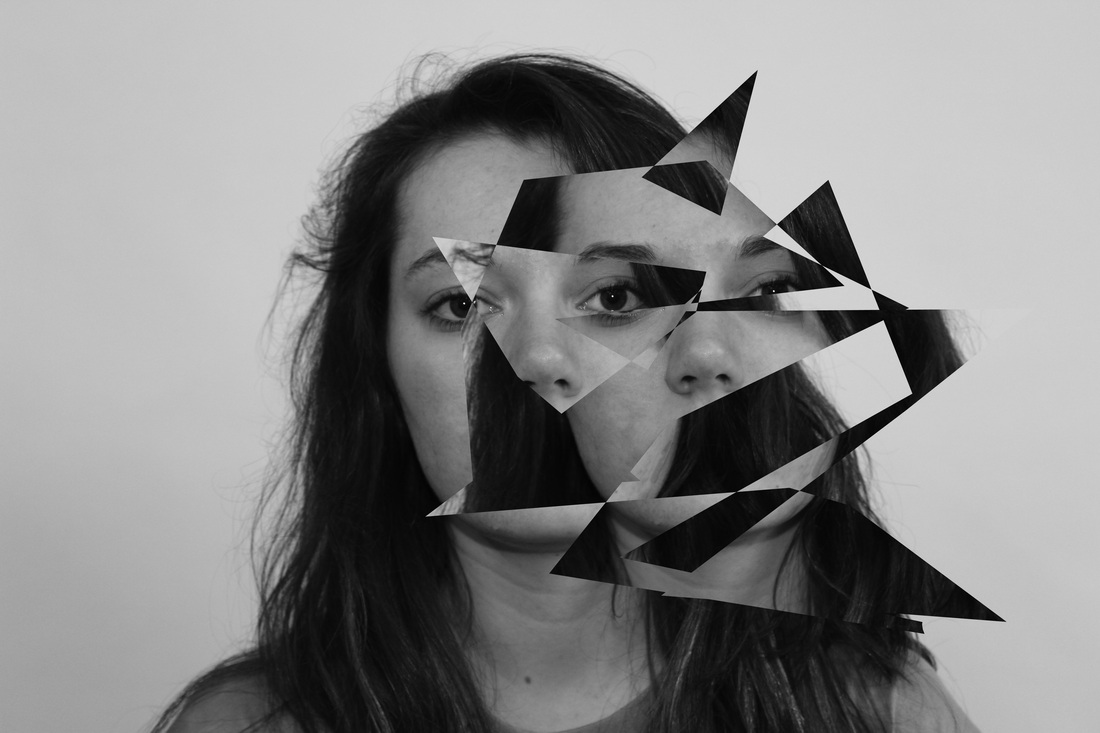

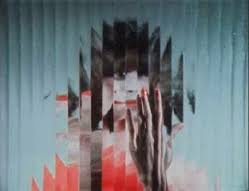
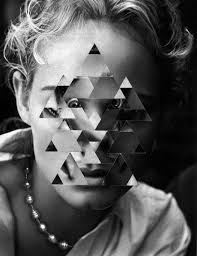
Second response - Gifs
For this second response i used the same ideas as Gordin Magnin, however, made it into a gifs to try and the transformation from normal to abstraction. i used two different shapes in my gifs, as i throughout it would give a range of details and difference. To create these gifs i firstly had to create the 10+ images with the different amounts of shapes. I used the free transform tool after i selected the area i wanted to move on their faces. After doing this i loaded the files onto a stack to start creating the gif. i then made frames from layer in the animation tab, and ordered them out into what looked the best.
|
This gif is constructed of 11 different layers, of the same image which have been cut and pasted into triangles of all sizes. I chose the triangle shape as it adds a sharper edge to the gif. This contrasts with the idea that the photograph as a whole is taken in the water and is very simplistic. The image is also in black and white which means the image is less eye-catching and bright however the sharp corners and edges from the shapes help keep this factor. i thought that by cutting and pasting the eye and mouth feature the image would look more abstract as it isn't possible to have multiple of these features. To improve the image i could have taken a wider shot. This would mean i would have been able to add more layers to the gif making it more complex and sophisticated.
|
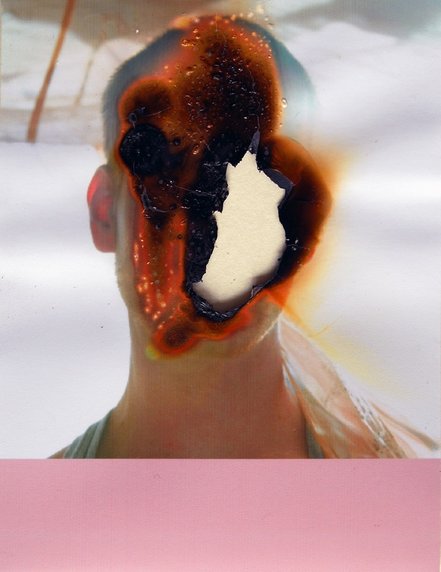
DEVELOPMENT-ABSTRACT PORTRAITS
Lucas Simoes
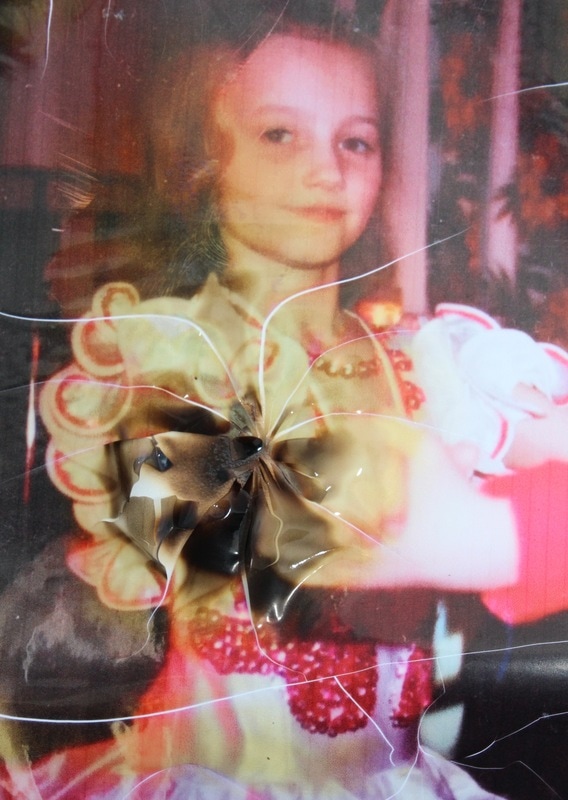
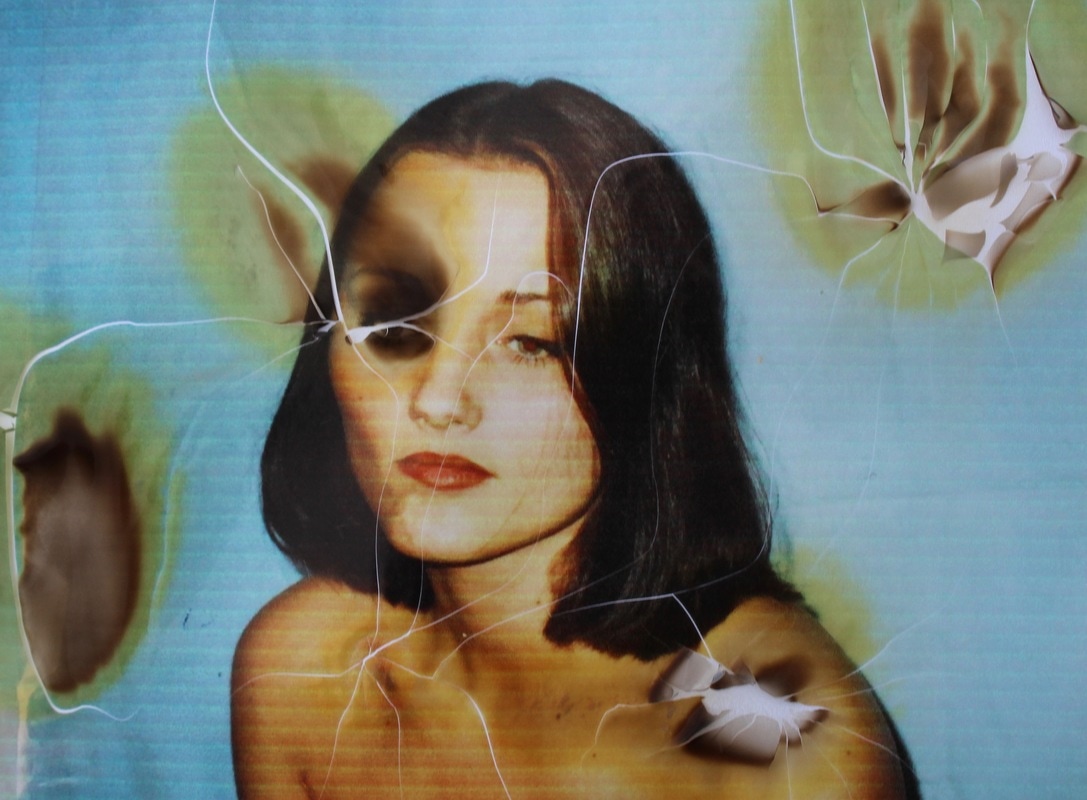
Brazilian artist Lucas Simoes, burns photographic portraits, to give them such personality that their remains sometimes come across as grotesque three-headed beasts and sometimes remind us of sparking memories of the pastIt takes skills to draw such diversity from such a simple and carnal concept, and for it to evoke such a suprising range of emotions, including sadness, fear, and compassion. He makes it clear that the pictures he used are in fact not his own and has taken them from multiple different courses. - "to burn pictures, a way of fisically erase a memory by burning it, so with time, the image that is burnt will disappear from your memory."
|
|
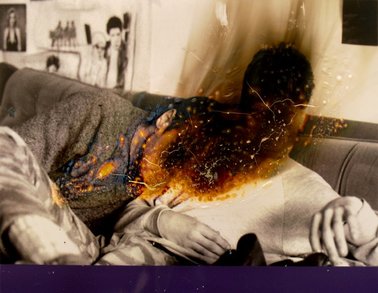
MY RESPONSE
For my response to Simoe's work i used a series of 3 images from 1997-2000, which i thought would look more antique and rustique if i used them to burn. i first experimented with a lighter to burn my pictures, however i found that this was too weak and i needed a more precise flame. I then experimented with a blow torch which when i turned the gas to a maximum the flame was perfect for precisely burning certain areas of my images. i digitally printed my images onto normal photographic paper which tended to produce a more green hue to the images, rather than a orange or red hue, which was produced with the artists images as he used developed photographs. i also found that when the flame was too close and become to hot the paper would crack. I thought that this particular look more effective as it added factors of the idea of a burned abandoned photograph.
|
|
|
|
|
|
|
|
|
|
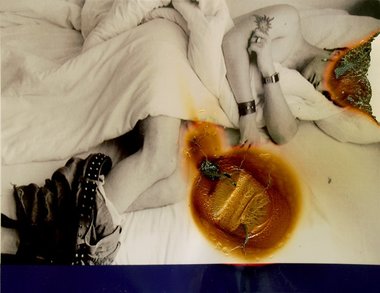
Artist and Me
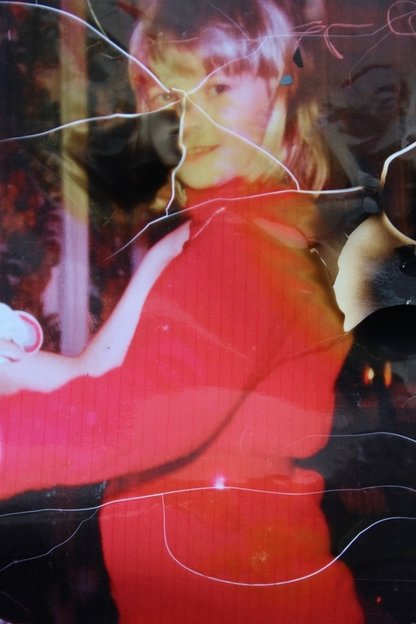
After studying the work of Lucas Simoes i found that he would overlay a specific colour on either the side or the bottom of the images and match the colour to the average burn colour of background. I tried doing this with one of my images and here is my result. i thought that i had found the correct tool to burn my images with however instead of digitally printing my images i should have developed them so that the colour schemes would be the same.

|
|
I think that to improve my response to this artist i could have experimented with burning paints onto of the photographs. This may have stopped the photo from cracking and also may have created more similar colours to Lucas's work if i had used colours such as red and orange.
STRAND 2 - DISORTED LANDSCAPE
Uta Barth - Artist link
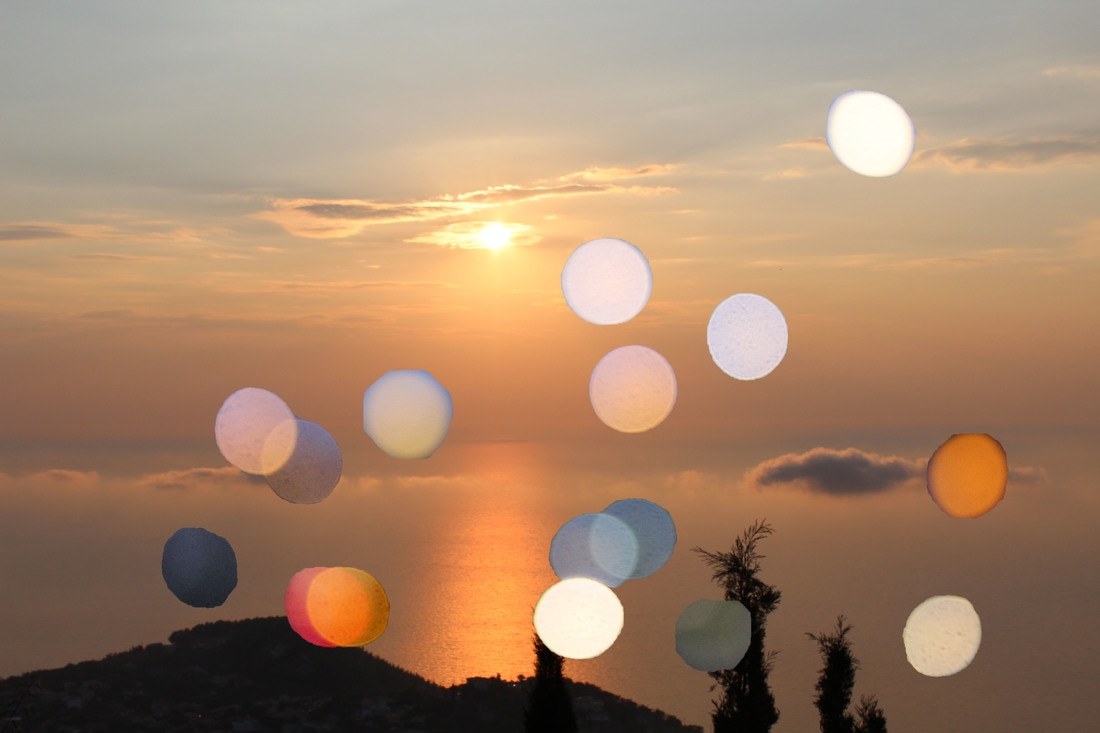
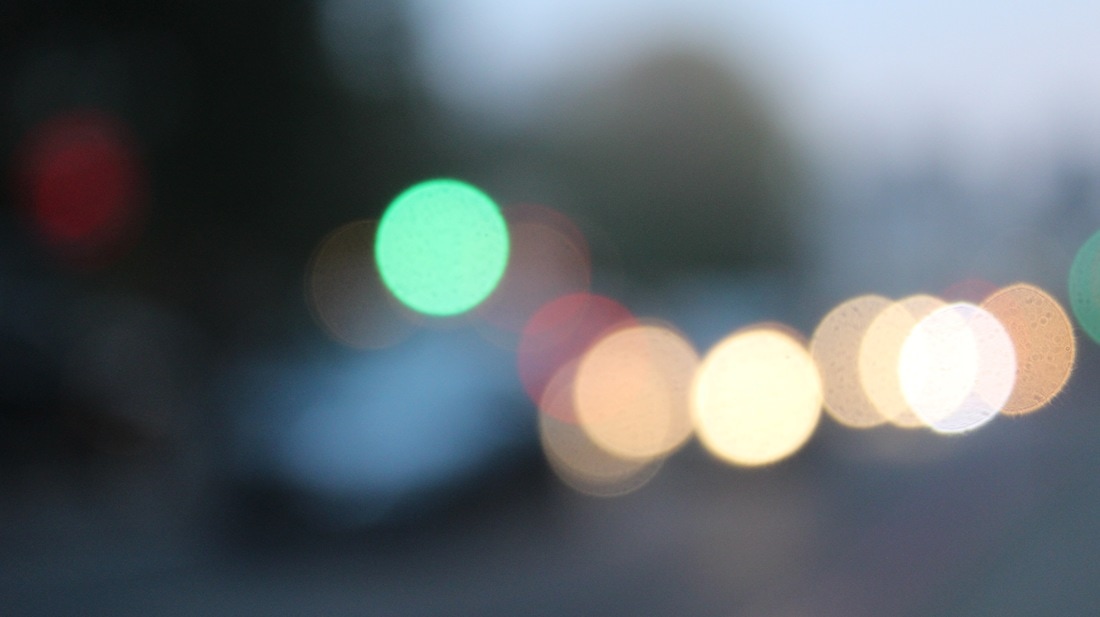
Uta Barth is a contempary abstract photographer who works with blurred landscape images. he work is represtented in numerous public private collections around the world. She examins photographic and visual persecptions and creates abstract and blurred photographs through the lens of her camera.
|
|
|
MY RESPONSE
|
|
SELECTED IMAGES
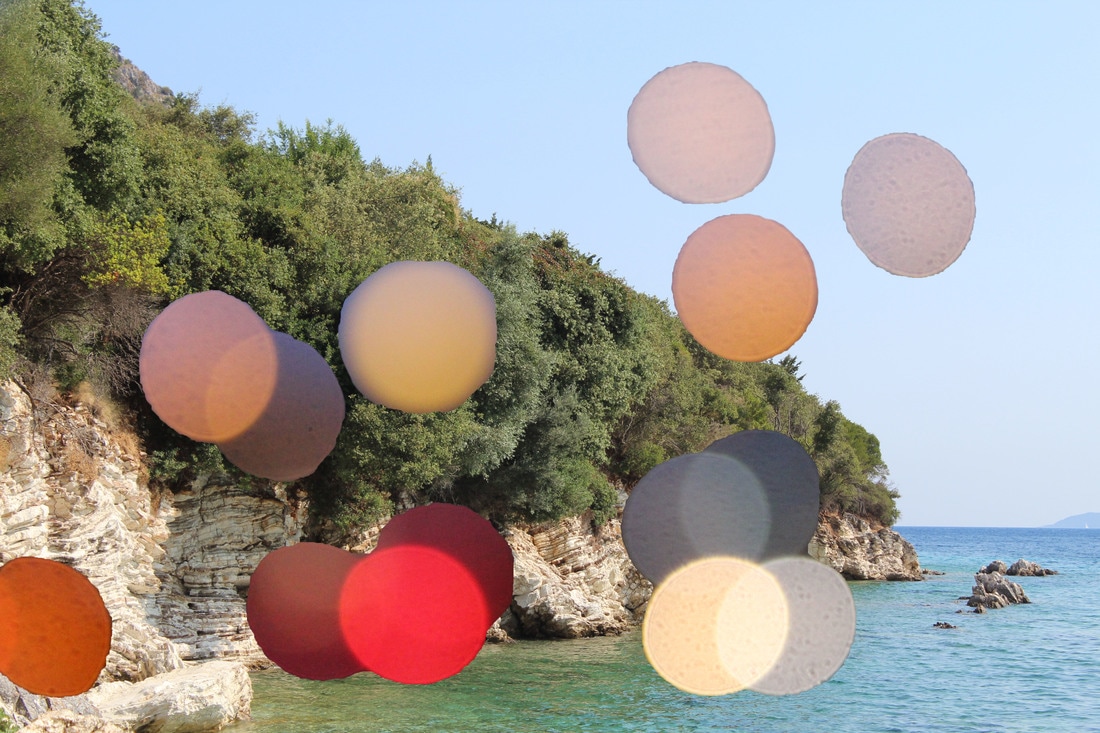
To show that this strand is about distorted landscapes i decided to mix the street lights from cars and lamp posts with the pure nature such as beaches and wildlife. i think that this contrast shows how
|
|
ARTIST AND ME
the work on the left is the work of Uta Barthes and the piece on the right is my own work. i thought that i was able to capture the correct focus of the street, as i created the blur from the lights and city cars. to improve my response i could have photoshopped the image's lighting and contrast to make it lighter and less contrasted with the other elements around it.
|
|
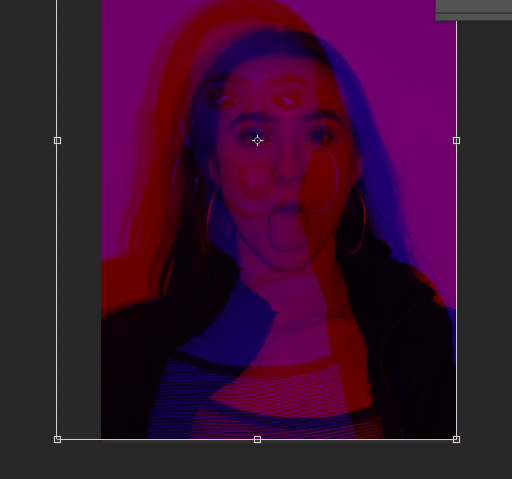
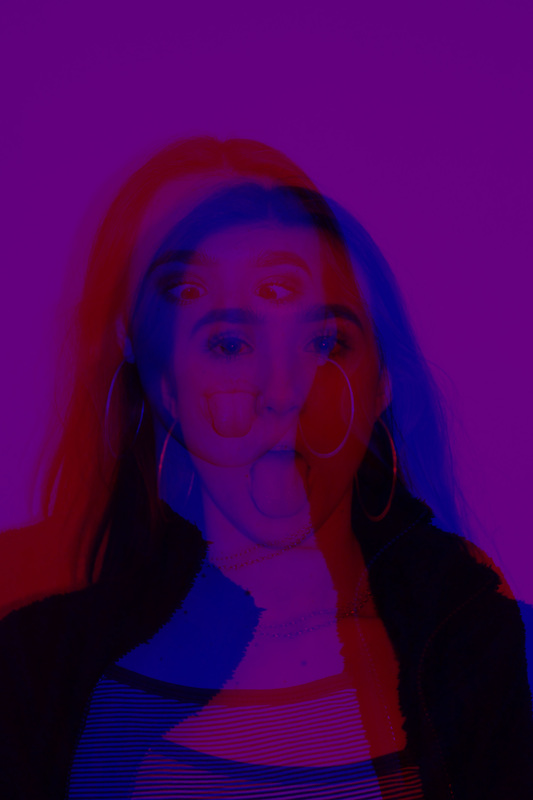
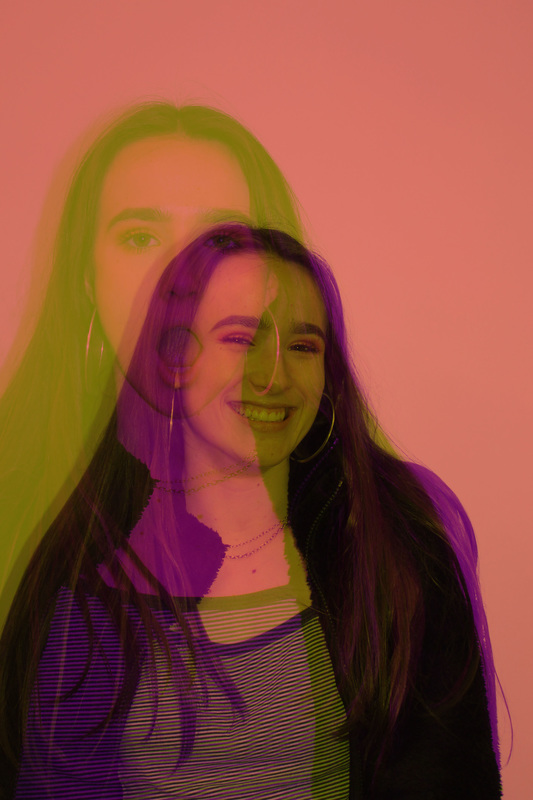
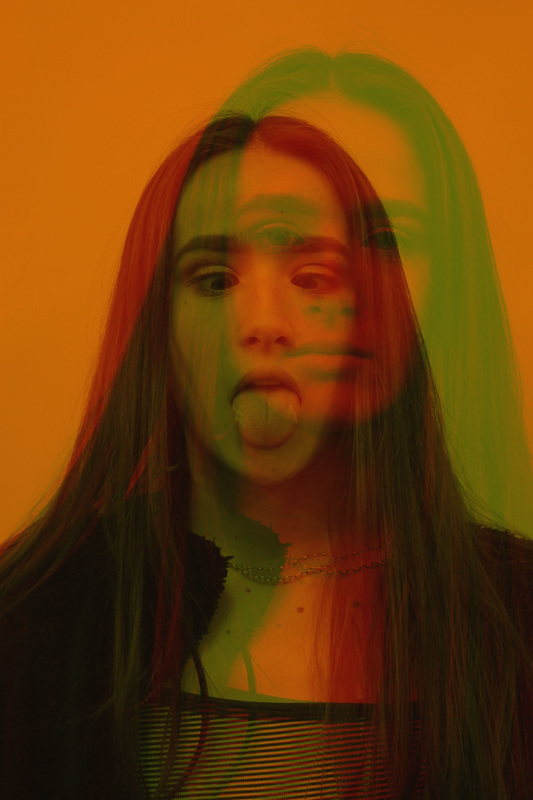
STRAND 3 - DOUBLE EXPOSURE
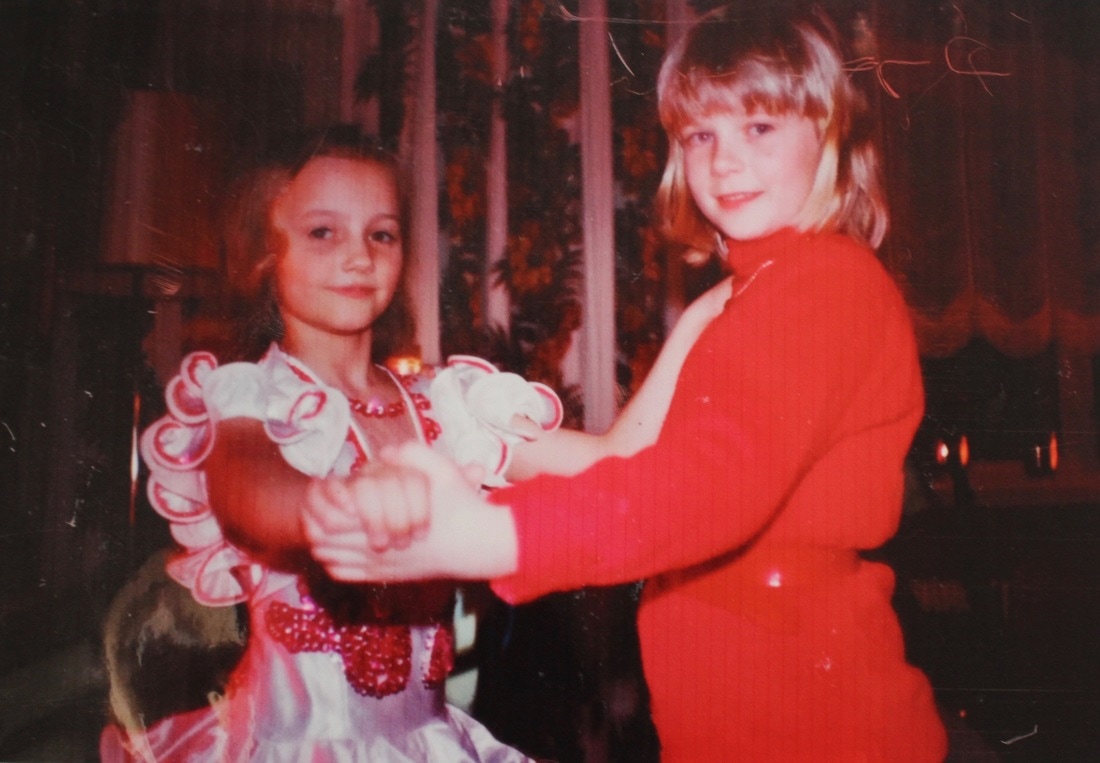
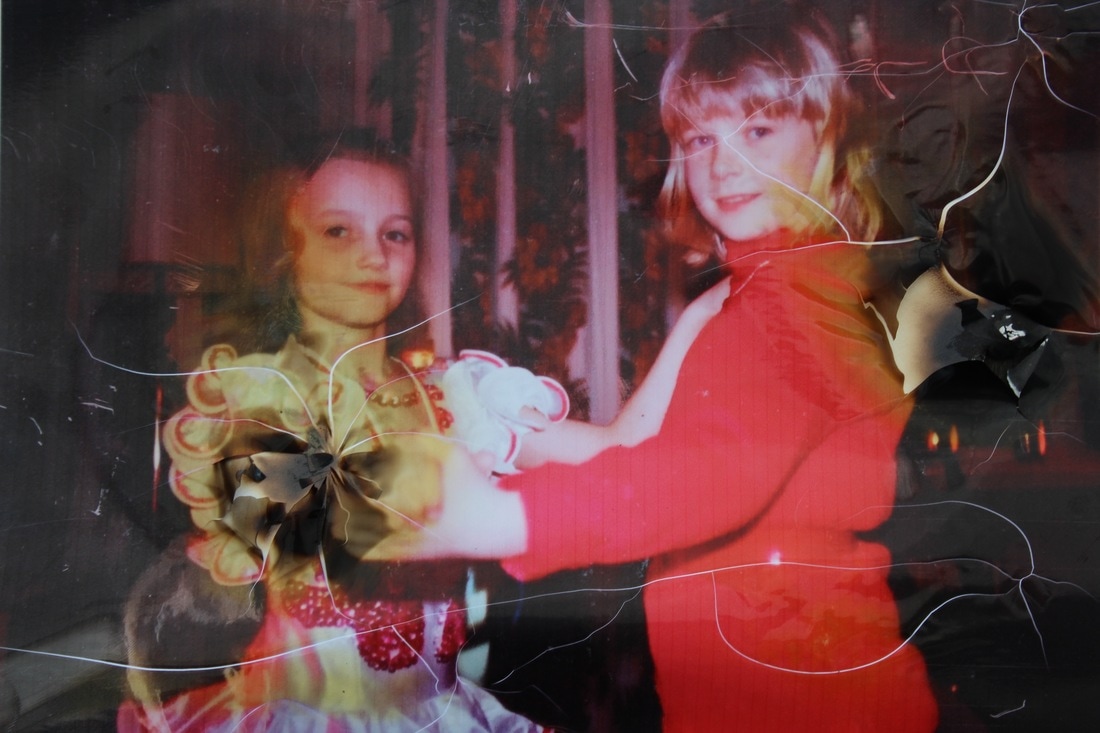
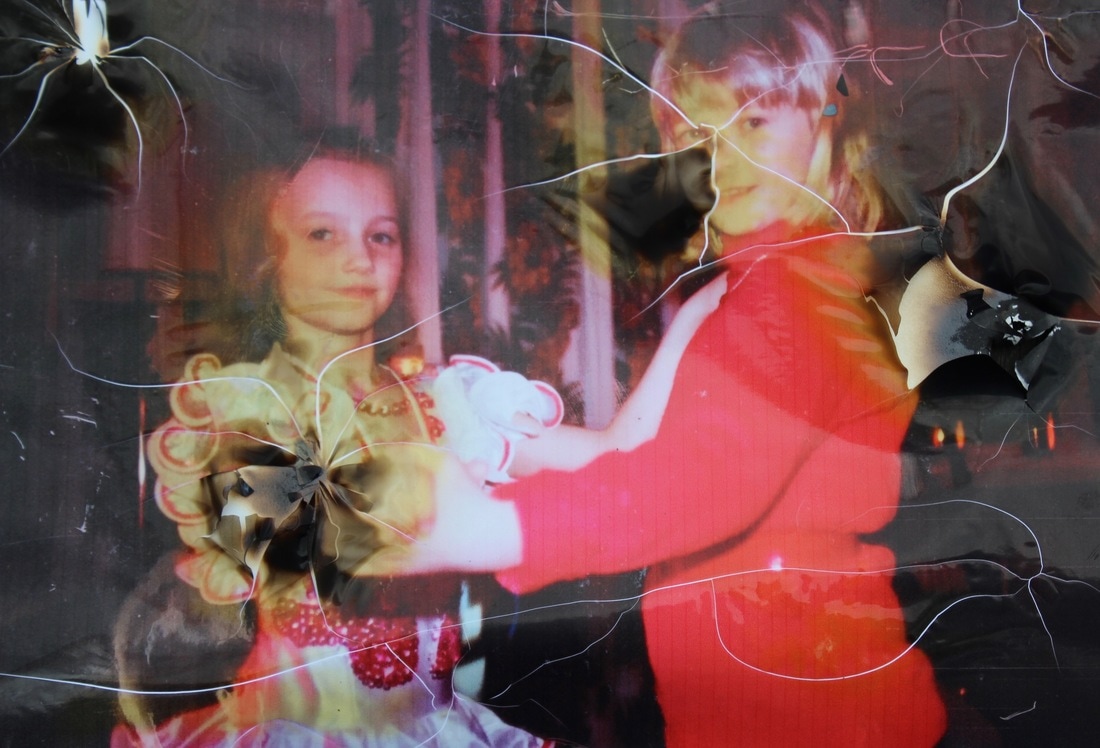
To start off this strand i experimented with different colours and made my models do different facial expressions. i started by only layering 2 differrnt images with different colours over eachother. Here are screen shots of the process and my 2 final images.
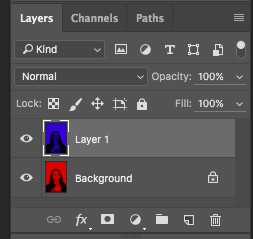
First i created 2 layers for my 2 images i wanted to edit.
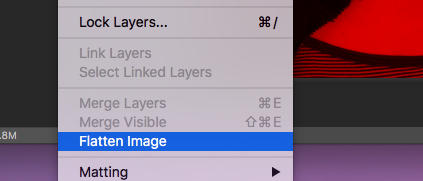
now i flattened both images so that they became a finished image this would then make it easier for the next step, to copy and paste the images ontop of eachother. To do this i selected the whole background and coppied it.
|
Here i double clicked the layer, and changed the channels of the photograph to create a vibrant colour throughout the whole image. i did this for both images with 2 different colours.

|
|
Once i had pasted one of the images ontop of the other, i could change the opacacity to create a 3d and abrast look to it. i then selected one of the layer and played around with the size of it .
|
|
|
|
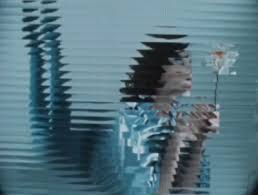
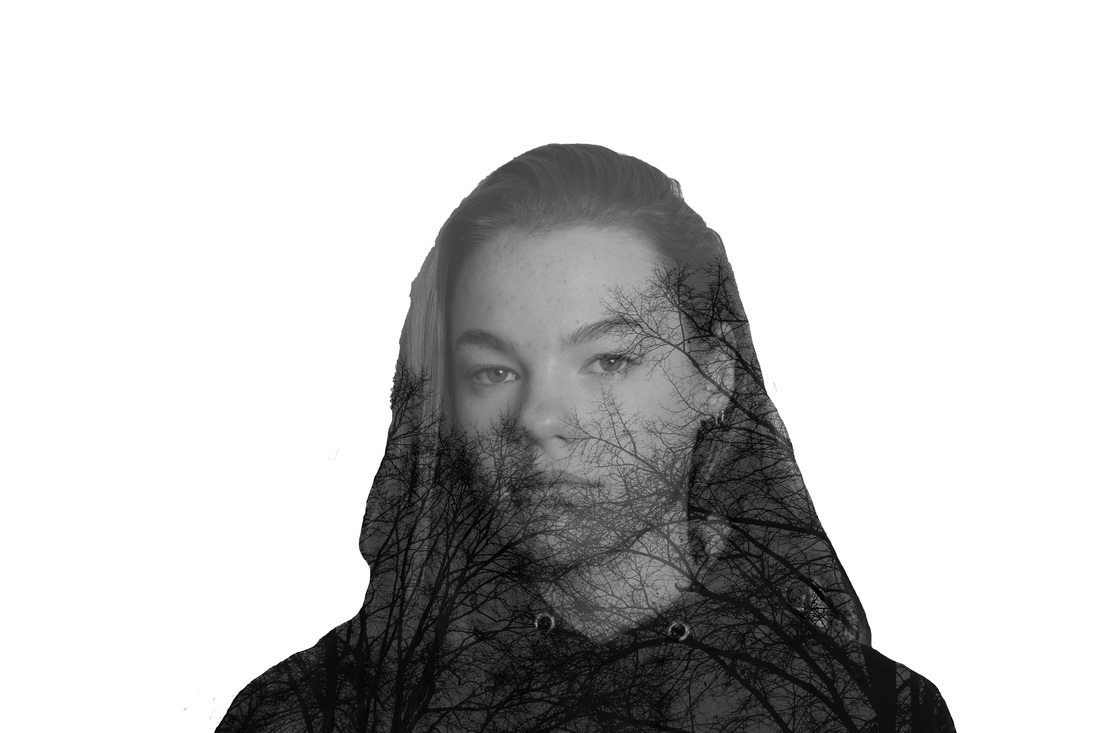
ARTIST LINK - CHRISTOPHER RELANDER
Christopher Relander applies a technique inspired by multiple exposure to create ‘We Are Nature’: a series of dreamy, surreal images based on the ambiguous relationship between man and nature. I will try to replicate his images below using a similar technique for my final pieces.
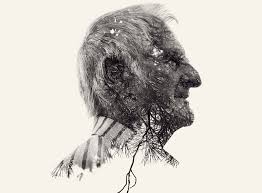
i think this image is effective as the man is positioned sideways which not only gives the image more detail but also suggests that he is looking at something further into the distance which creates an enigma for the audience.
|
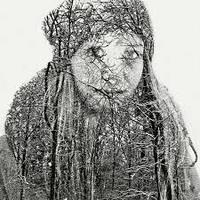
The girl in this image look upset which makes hr seem vulnerable. I think the trees in her silhouette adds this aspect or worry and lostness into the image. i also like the way she is face on as it gives us a better view of her expression.
|
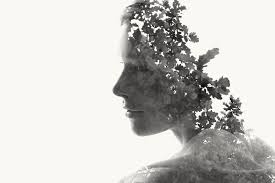
i thought this image way very effective as the leaves from the trees are used as her hair and fade into the image so that there is not clear figure. i also like the way she is facing sideways as it lets you explore her facial details.
|
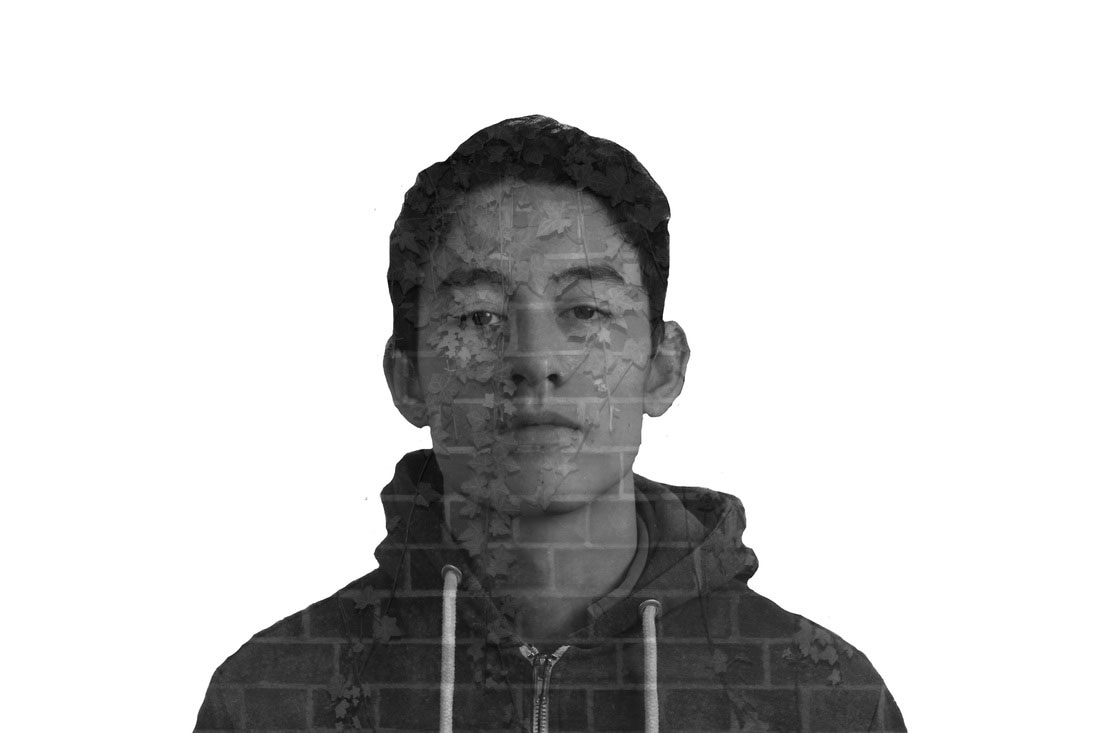
MY RESPONSE
Here is the process i used to create these images:
|
First i selected around my image that i wanted. Then copied and pasted it onto the the background. then i pressed comand T to ajust the image size.
|
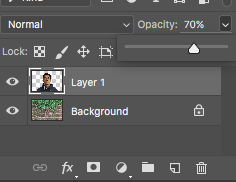
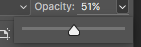
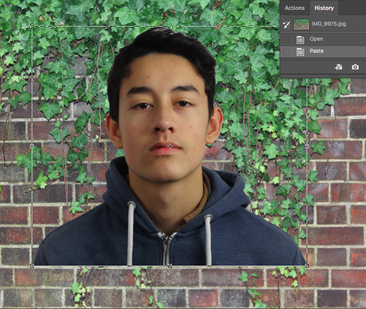
Then i clicked onto layer 1 and adjusted the opacity to 70% so that you could see the background.
|
|
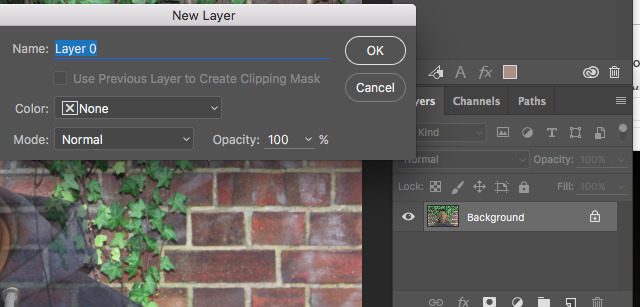
I then flattened the image to make it just one locked ackgruond. then i double clicked the layer and unclocked it.
|
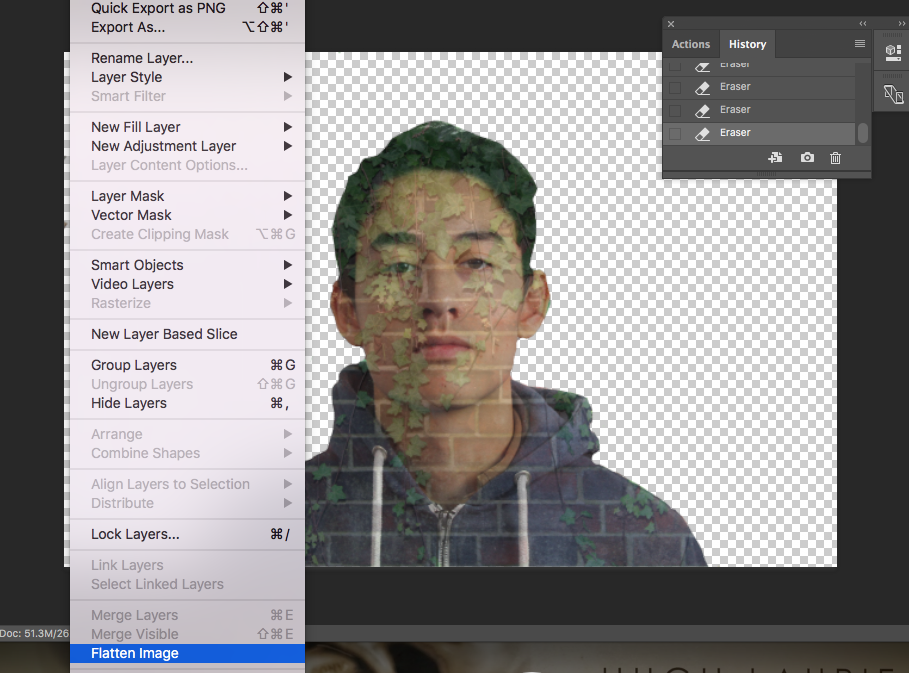
|
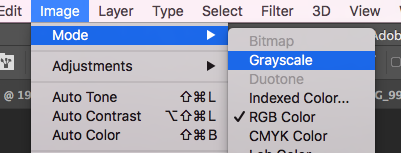
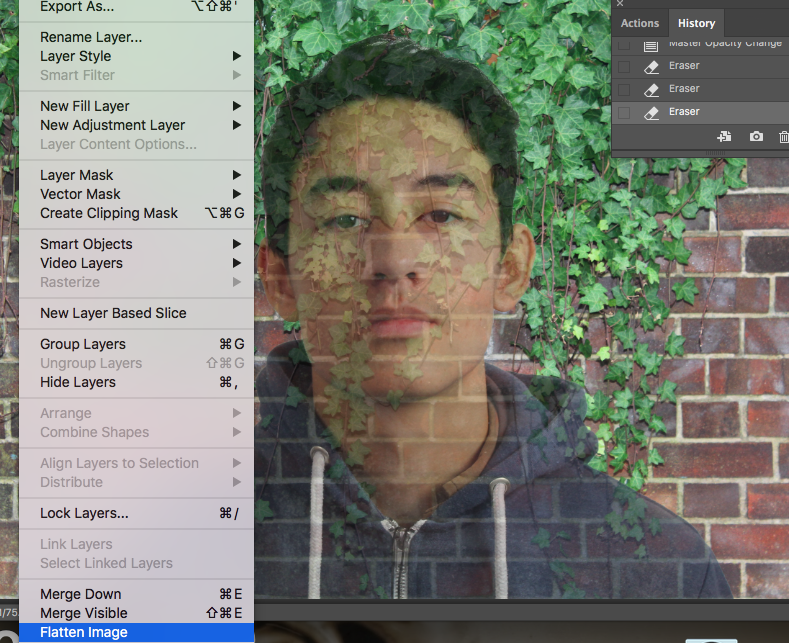
For the last step i erased the background around him. so that it was only his silouette with the ivy brick background. Then i flattend the image for one last time and made it black and white.
|
|
|
PREFFERED STRAND - DOUBLE EXPORE DEVELOPMENT
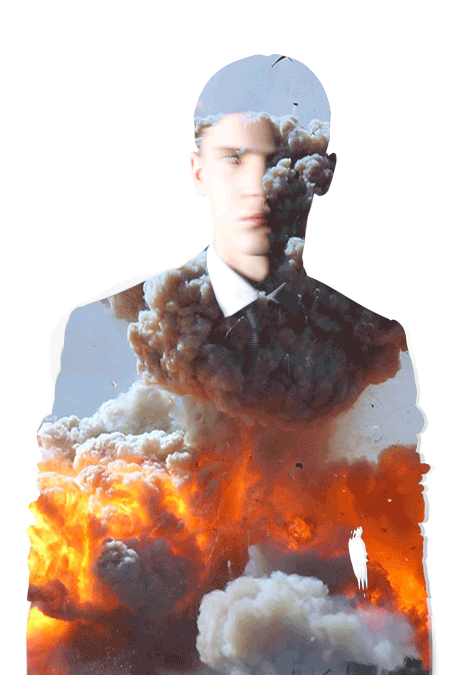
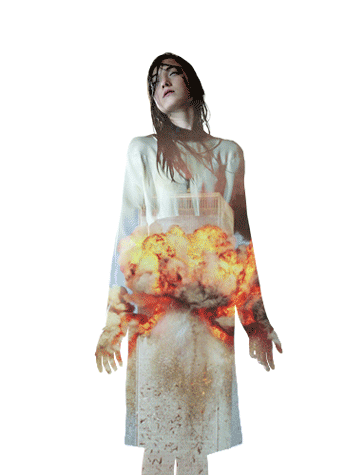
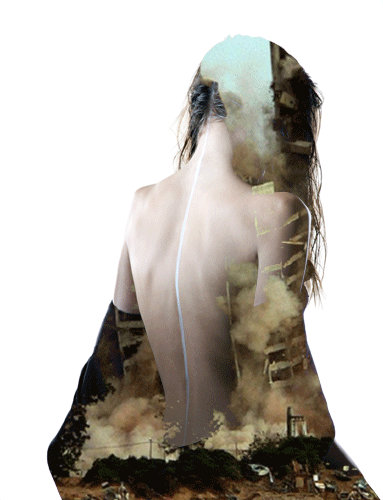
Pierre Debusschere - Artist link
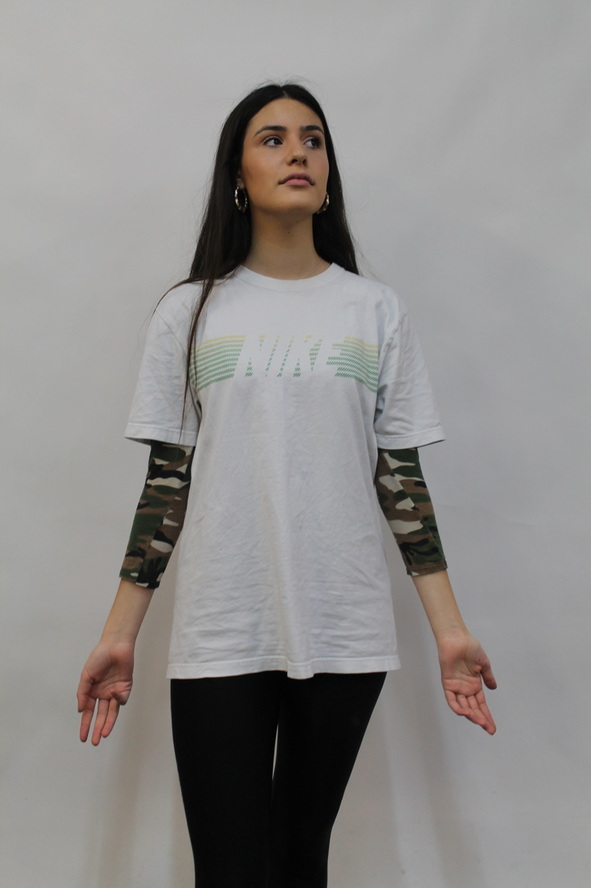
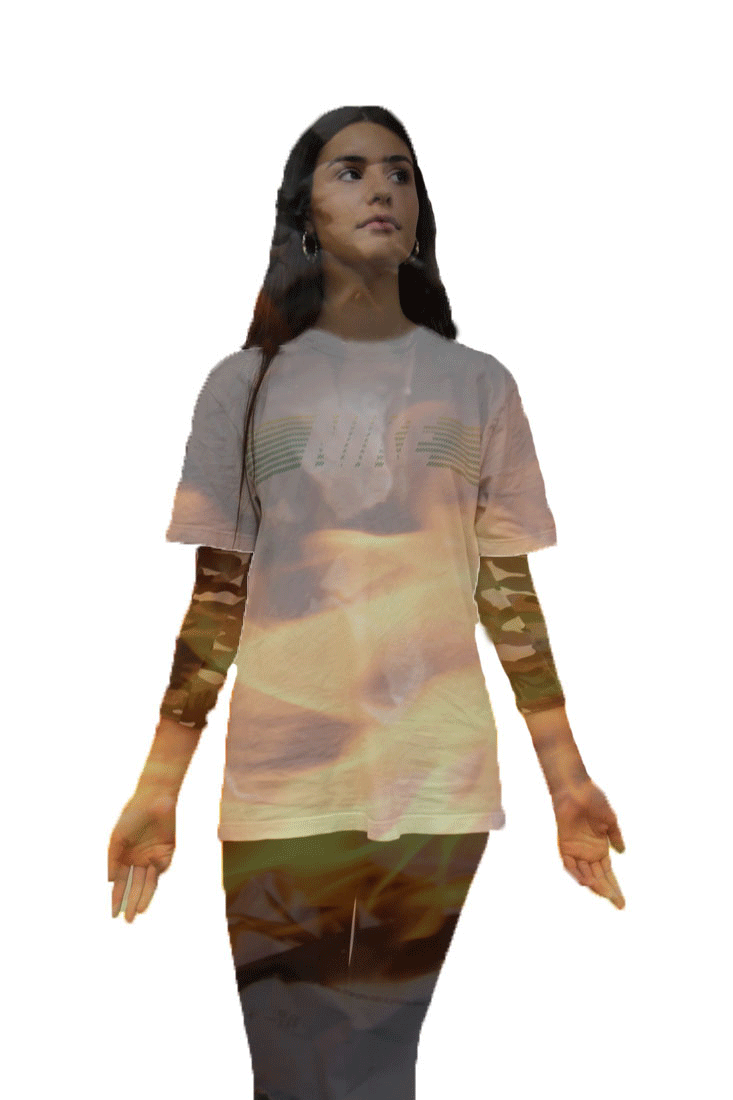
Pierre Debusschere is a visual artist working in the fields of photography & video. He has shot editorials for several leading magazines such as Vogue Homme Japan and Citizen K, as well as being a regular contributor to Dazed & Confused. His work has been exhibited throughout Europe including a presentation at Colette in Paris during fashion week where he creatively interpreted the collections, producing an original fashion film based on a runway collection each day. i like his gifs as i find the way his has the still photograph of people, and a dramatic moving background very effective.
|
|
|
My response
I used this image but for both my responses however changed the gif picture in the background. Firstly i used a series of pictures of fire, i thought this would look effective and was a good response to his work as he also used explosions and fire in his work. This image is simplistic and easy to edit and add images into.
|
First response
|
Second response
|
|
|
Final Piece Process
|
|
|
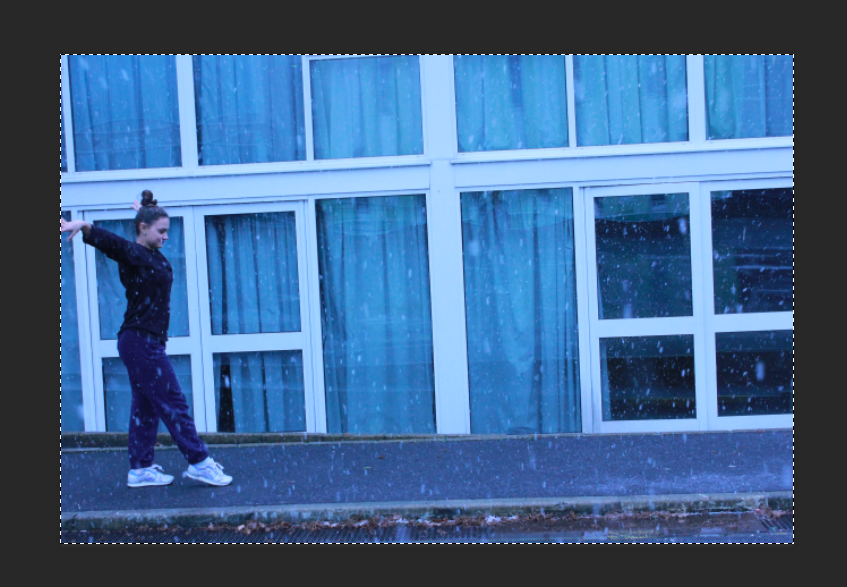
8 fast shutter speed shots i used ...
Process of Construction
Select the whole image.
|
The first step was to copy and paste the shutter speed image onto the background. Then unlock the layer and make sure you have selected the background.
|
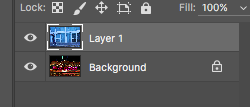
then use the lasso tool and select the whole body and copy it.
|
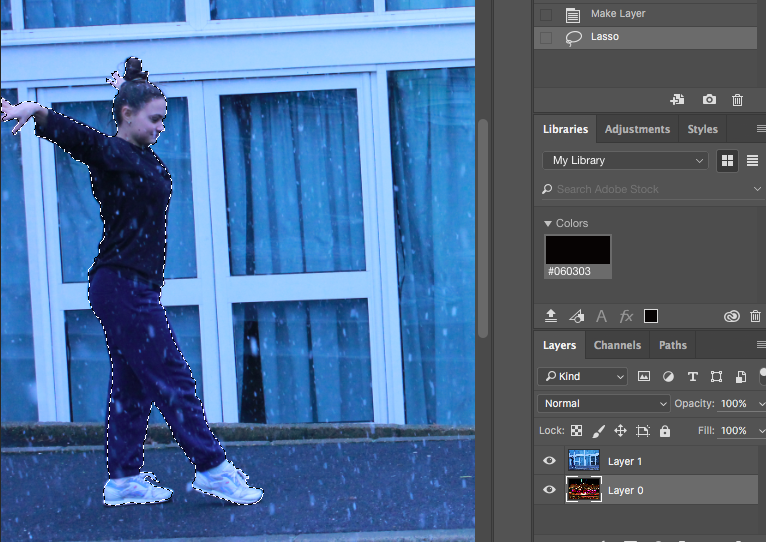
Open a new background, in this case i just used a plain white background and paste the layer 1 image onto the background layer.
|
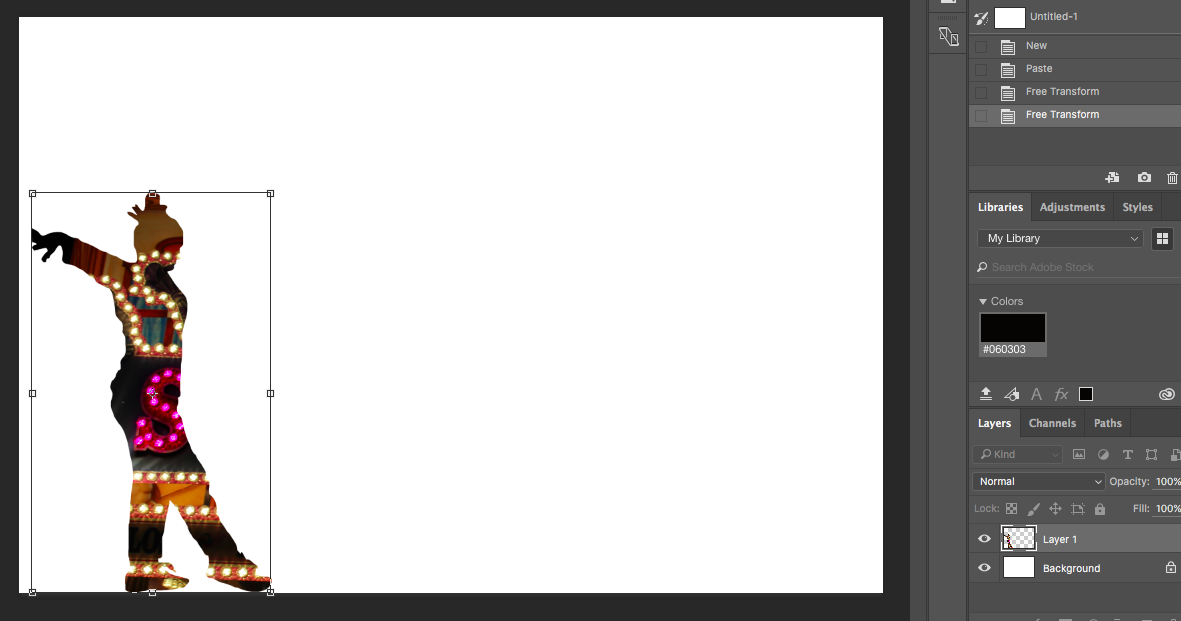
I then simply pressed (cmd T) to adjust the sizing and positioning of the silhouette.
redo these 5 steps for all your shots and then move onto to steps 6-10 |

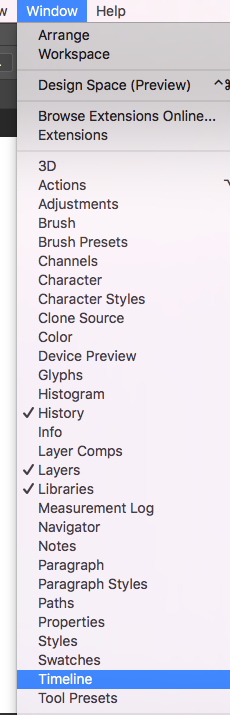
To create the gif go to file - load file into stack.
|
|
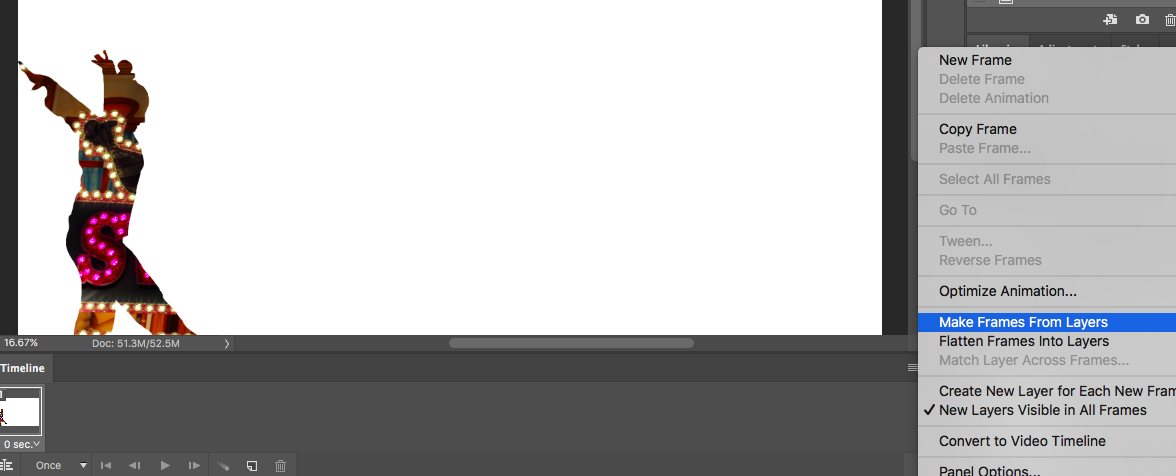
After loading the images into a stack open the timeline from window and select create frame layers. then as shown above click on make frames form layers.
once you have done that rearrange the images into the correct order and select the correct timing for you gif to move. save the gif from web legacy. 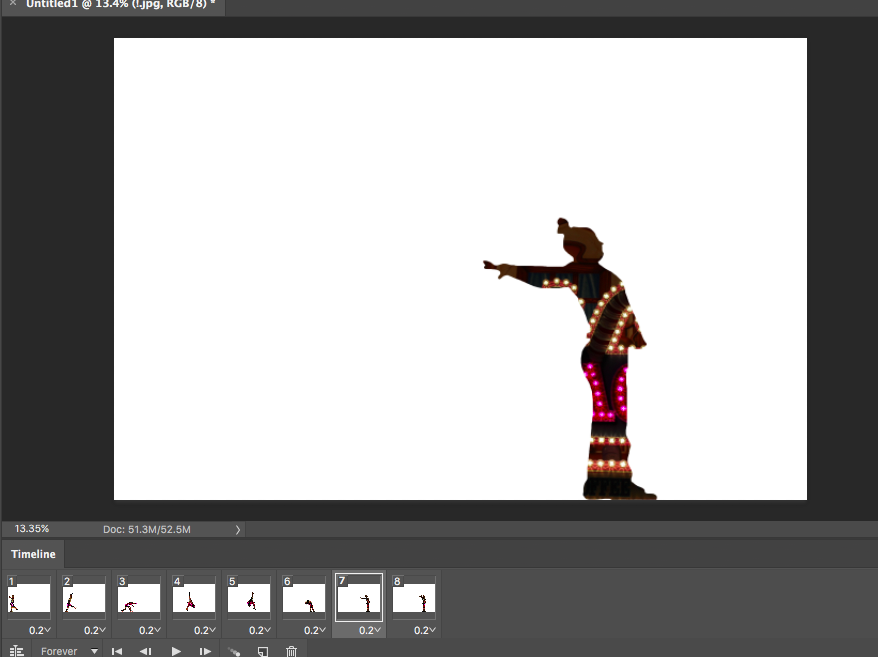
|
FINAL PIECE
I created 3 different final pieces, all with the same concept of eachother. I created gifs with bright background lighting and silouettes to keep them abstract this also linked to the gymnast in the picture as... I thought that by using a gymnast to model for my work it would make the piece much more eye catching and would challenge me to use the lasso tool in an advanced way as the body was difficult to capture as a still image when taking the bursts.
In this first final piece I used two different backgrounds., both which I took from the lights in winter wonderland. I then made 8 different frames for my gifs using the bursts of the gymnast.. I think this first piece was successful as I managed to make the objective clear, and keep the editing neat which makes the image look much cleaner. I thought that I could have made it more simplistic and the two bright backgrounds took off some of the perspective of the moving model which should have been the main focus point.
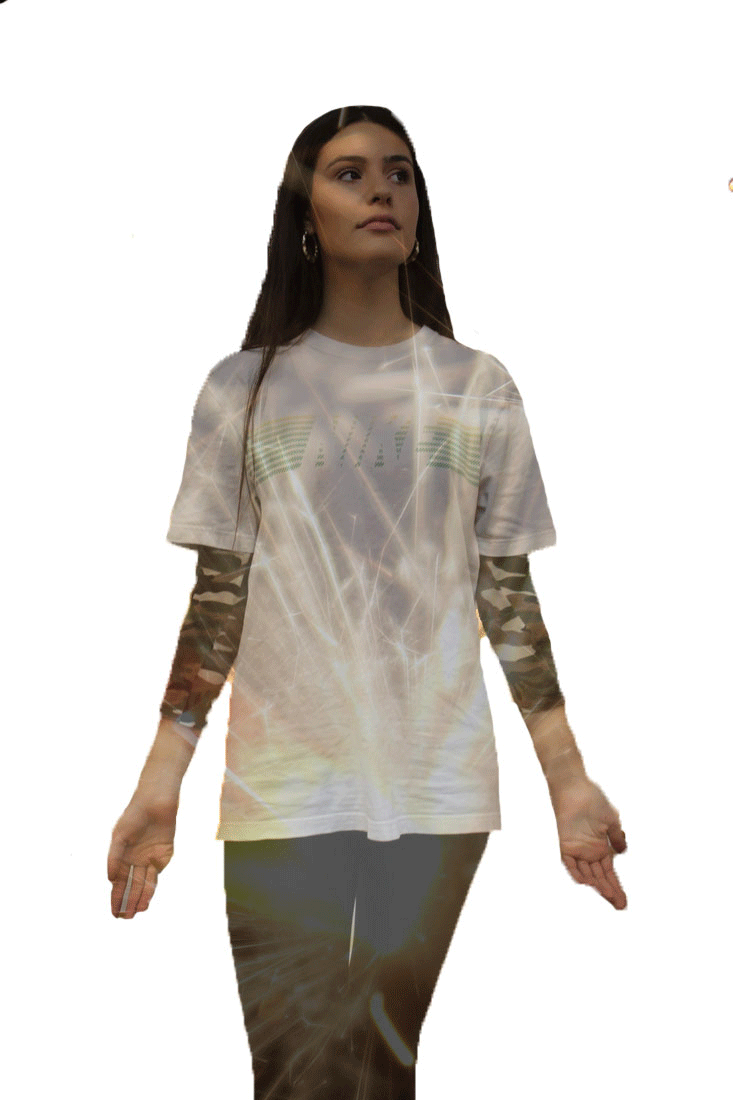
In this secdon giffs I created I focused on what could have gone better in my other gif. I decided to create this final piece much more simplistic and only have the background in the silhouette of the gymnast and have a white background rather than having too much going on in the images.I thought that this was much more effective as the simplicity of it made it much easier to look at and made it more clear for the viewer on what was going on. I also thought I used a good image in the siluette as the lights inside change colour and dimness and the gymnast moves along. Howver I could have made the gif slightly slower as I used 0.1 seconds which would have been better as 0.2 to slightly delay the movements so we could see each frame for a little longer.
in my third gif with a different movement, but also instead of a still back ground image i used a series of 9 photographs i took throughout the day of the exact same spot, to see the difference in lighting, and the change in the clouds and the way the trees move. i though that this was effective as it bring more sophistication to the gif, and adds more layers to look at.
In this first final piece I used two different backgrounds., both which I took from the lights in winter wonderland. I then made 8 different frames for my gifs using the bursts of the gymnast.. I think this first piece was successful as I managed to make the objective clear, and keep the editing neat which makes the image look much cleaner. I thought that I could have made it more simplistic and the two bright backgrounds took off some of the perspective of the moving model which should have been the main focus point.
In this secdon giffs I created I focused on what could have gone better in my other gif. I decided to create this final piece much more simplistic and only have the background in the silhouette of the gymnast and have a white background rather than having too much going on in the images.I thought that this was much more effective as the simplicity of it made it much easier to look at and made it more clear for the viewer on what was going on. I also thought I used a good image in the siluette as the lights inside change colour and dimness and the gymnast moves along. Howver I could have made the gif slightly slower as I used 0.1 seconds which would have been better as 0.2 to slightly delay the movements so we could see each frame for a little longer.
in my third gif with a different movement, but also instead of a still back ground image i used a series of 9 photographs i took throughout the day of the exact same spot, to see the difference in lighting, and the change in the clouds and the way the trees move. i though that this was effective as it bring more sophistication to the gif, and adds more layers to look at.
